
New tiles in your bathroom are a beautiful addition that will last for years. Plus, there are several durable and practical materials ideal for a bathroom. Installing new tiles uses only a few simple tools that can be found in most households.
Types of Tiles to Choose
Although most people use porcelain tiles for their bathrooms, there are several options that you can choose from.

Porcelain Tiles
This choice is ideal if you want your bathroom tiles to last for decades. Plus, porcelain can be made to look like wood, stone, or any other material, while retaining its sturdiness and water resistance. These tiles might be slightly pricey, but they are an excellent long-term investment.
Ceramic Tiles
These tiles are made from the same material as porcelain tiles. However, ceramic tiles are less finely ground, and they can be used for walls, too. They also cost less, allowing you to achieve a luxurious look for less money.
Marble Tiles
Marble tiles are an excellent choice if you want to make a luxurious bathroom. You can also find them in many different colors to perfectly fit your style, but note that they are a costly option.
Mosaic Tiles
These tiles are made from various materials, including porcelain and glass, hence their eclectic look. They are not expensive and will turn your bathroom into something completely unique.
Limestone Tiles
Limestone tiles are excellent if you want a more natural look for your bathroom. They are durable and also provide a sense of comfort due to their brown and beige color combination.
Slate Tiles
If you have a large family and the bathroom is often used, slate tiles are an excellent choice. They are highly durable and almost impossible to crack or scratch. Also, these tiles come in many different colors but note that they can be a bit expensive.
Vinyl Tiles
Vinyl is a good option since it’s highly durable, easy to maintain, and cost-effective. You can find them in different color variants, or even vinyl that looks like wood or stone. These tiles are slightly pricey, but the price is definitely justified with quality.
Pebble Tiles
These tiles are very popular among people who want to add a sense of nature to their bathroom. They might require a bit of maintenance, but if you maintain them properly, pebble tiles can last for decades.
Terracotta Tiles
Terracotta tiles are ideal if you want to achieve a Mediterranean look in your bathroom since they are usually orange or yellow. Although they might be slightly tricky to install, terracotta tiles will create a sense of warmth and comfort in your bathroom.
Glass Tiles
If you want a material that is easy to customize, you should opt for glass tiles. They come in numerous shades and colors and are highly practical. Plus, glass tiles are both water and stain-resistant.
Tile Floor Around a Toilet Guide (4 Methods)
There are four basic methods on how to tile your bathroom, including the floor around the toilet. We will go step-by-step through each method so that you can understand which is easiest for you.
Method 1: Cut Around an Installed Toilet

First, install the full tiles that surround the toilet. Most likely, there will be four tiles that are not yet installed that you have to modify. Keep in mind, if the toilet is already installed, make sure to leave a space of around 5 cm between the toilet base and the edge of any tile around.
Next, cut four sheets of paper to match the size of the tile. Then, put all the sheets around the toilet base and fold them so that they match the exact shape of what the tile should be cut like. Mark the cut locations with a marker and remove the sheets. Also, note that it’s better to overestimate the cut location than to make it smaller than it should be since it will leave space between the tile and the toilet.
Now that you have an accurate template for each tile, cut these sheets of paper and put them around the toilet base again. If everything fits properly, put the sheets on the tiles and trace the cut locations. Then, using the tile nippers, carefully remove the extra material from each tile. An important thing that you should remember is to wear safety glasses and gloves. While cutting, shards might get into your eyes, or you might cut your hands on sharp edges.
Method 2: Tracing Cut Lines

In this case, you should tile the whole bathroom, but leave space for one tile where the toilet flange should be. However, if your tiles are small, you might need more than one. Like the previous method, you’ll need sheets of paper that match the tiles that haven’t been installed yet. Put those sheets over the flange and trace the flange onto the tile(s). You don’t need a perfect trace since the toilet will sit over the flange. Additionally, make sure not to throw away the paper, since you might need it again if you don’t cut the tile properly.
Method 3: Cutting Multiple Tiles
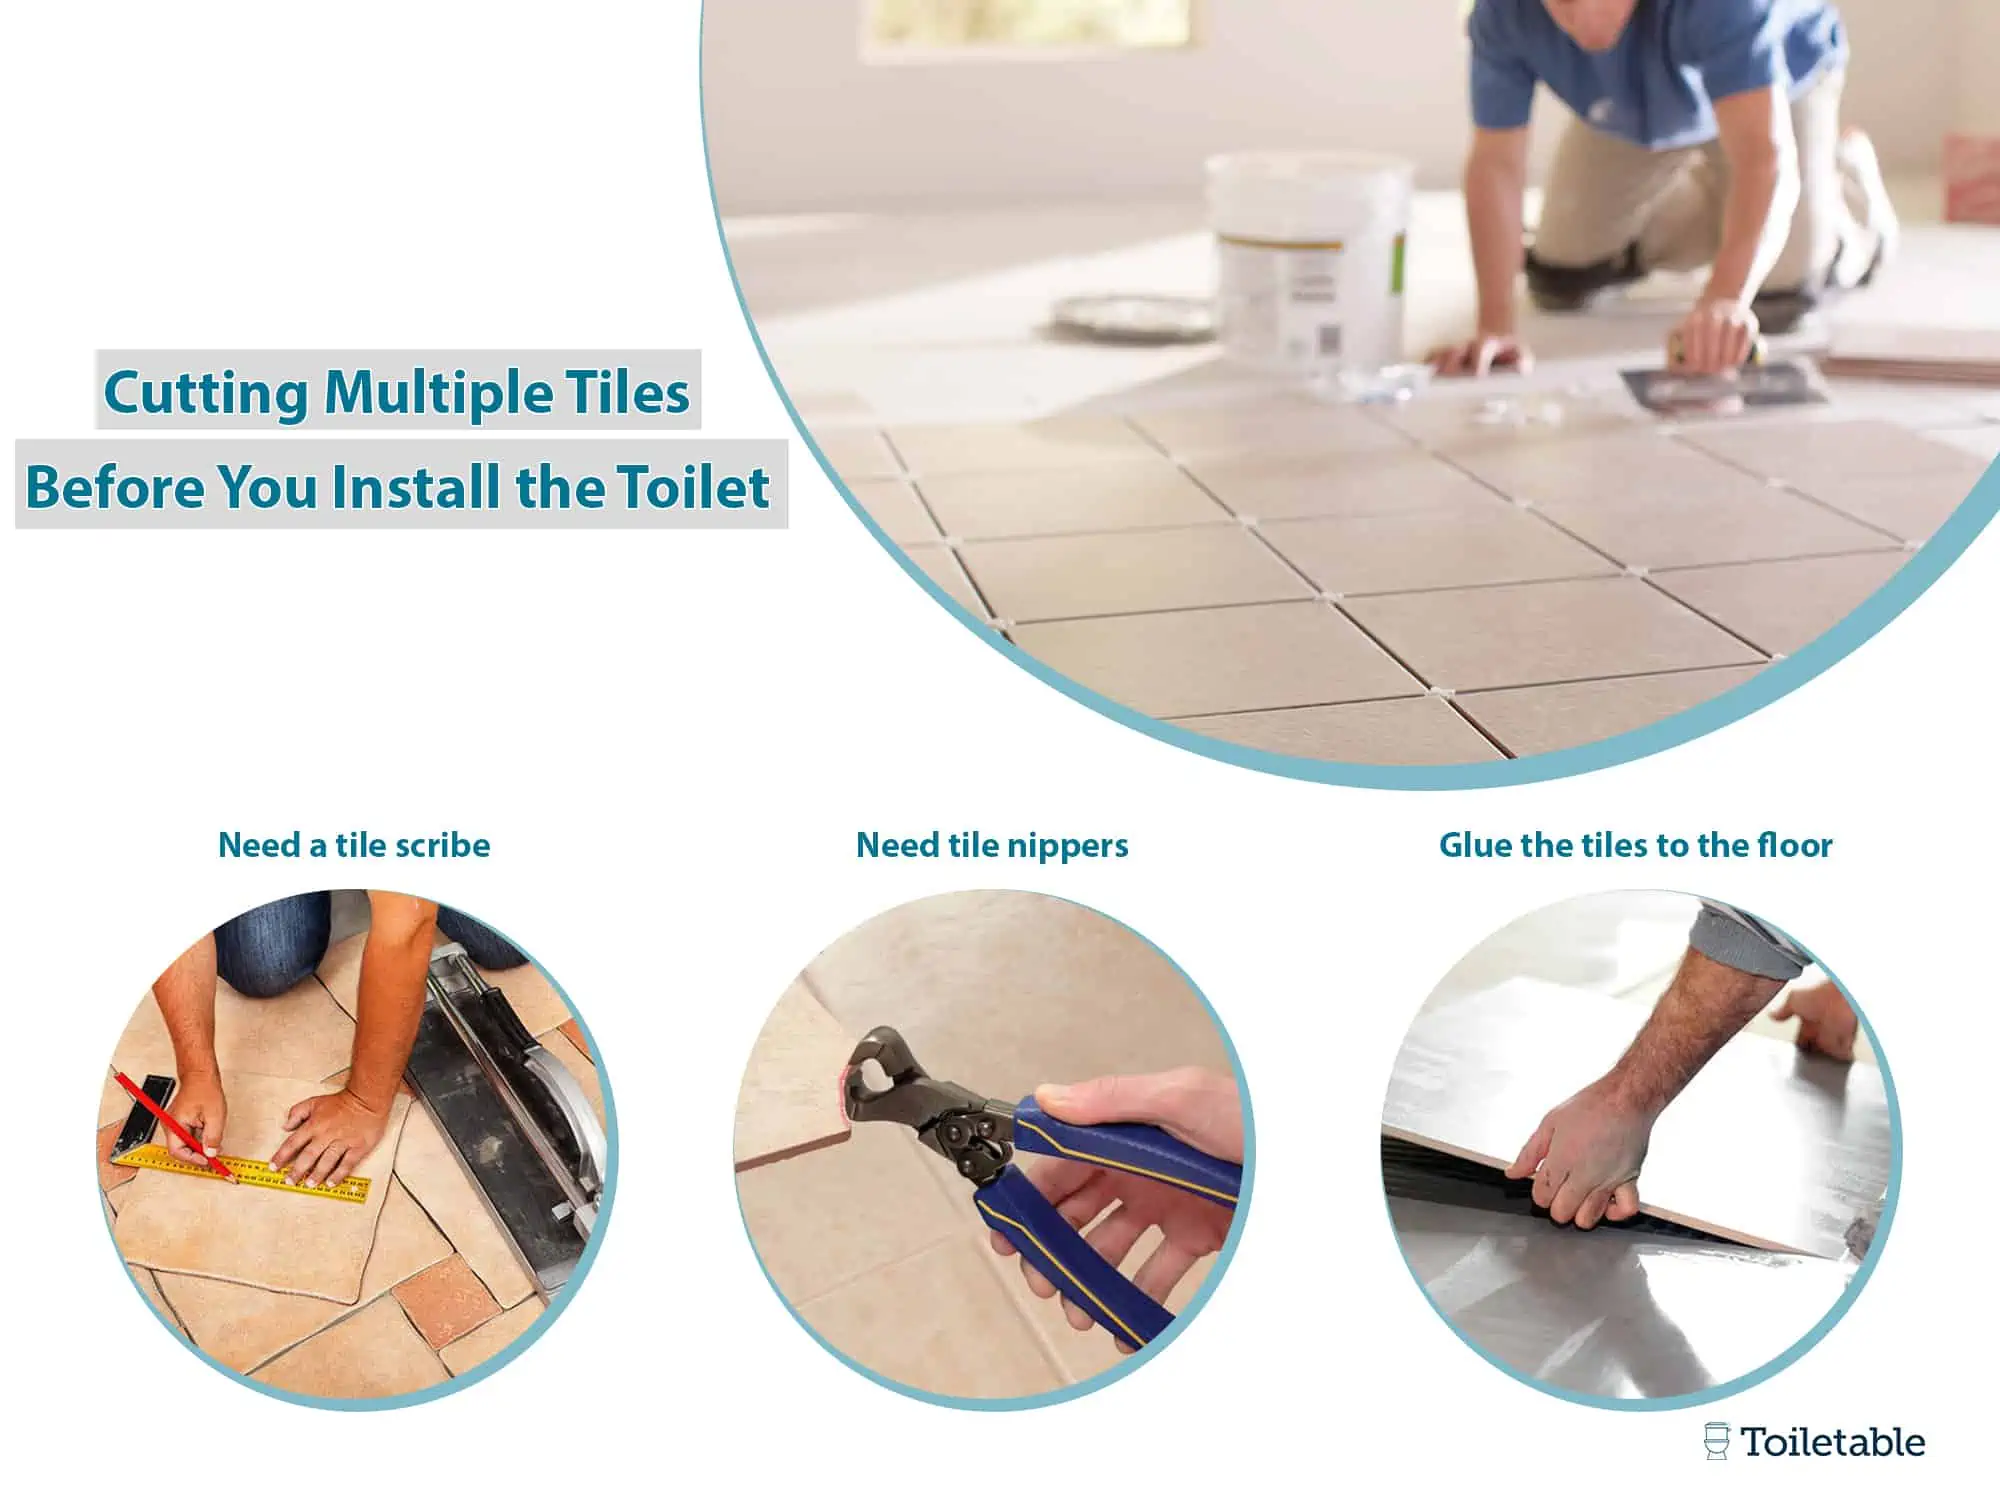
For this method, you will need a tile scribe, which you can find in most hardware stores. Plus, you will need tile nippers to cut away extra tile. We advise you to start from the corner and take small “bites” as you go along the line. Of course, make sure that your eyes and gloves are protected.
Before you glue the tiles to the floor, make sure to dry-fit them to see if everything fits properly. Keep in mind, if you would like to use a removable flange, make sure to remove it before dry-fitting and when gluing the tile to the floor.
Method 4: Cutting a Single Tile

The easiest way to do this is by using an angle grinder and a diamond wheel blade. Position the grinder 45-degrees to the tile and slowly cut the circle that you marked before. Make sure not to wear any jewelry or long sleeves, and of course, wear a dust mask. The grinder will produce lots of dust which can be unhealthy if you are exposed to it for too long.
If the circle is too close to the edge, it’s a good idea to cut “sacrificial break notches.” Basically, cut two lines that run between the edge of the tile and the closest point on the circle. It will prevent the tile from breaking while you are cutting the circle. Of course, dry-fit the tile that you’ve just cut to make sure that it fits properly.
Frequently Asked Questions
How Long After Tiling Do I Install the Toilet?
Usually, you should wait between two and three days before installing the new toilet or putting the old one back.
How Long Do I Wait for Grouting After Laying the Tiles?
The common rule is that you should wait at least one full day. Although the edges might look dry pretty soon, the material under the tile doesn’t receive as much air and takes longer to dry.
Our Take
Tiling the floor around the toilet can be challenging for those with no DIY experience. However, if you have some basic DIY experience and at least some experience with tiling, it won’t be a problem. No matter what type of bathroom and toilet you have, we are sure that one of these four methods will help you to tile floor around toilet.