
Fixing a toilet chain might seem complicated, but we promise it’s not rocket science! It’s a common problem homeowners come across, and you can certainly rely on a plumbing professional to fix it. But if you’re up for a little DIY, you can tackle the job yourself.
While replacing a toilet chain is as simple as shutting off the water supply and replacing the faulty chain with a new one, the process can be time-consuming and requires adherence to necessary steps. If you don’t follow proper protocol, you run the risk of making the situation worse.
We have many fix and repair guides, and this one is the perfect choice if you’re looking for details on how to repair a broken flush chain in your toilet. We’ll go over a few pieces of important information in this ultimate guide.
Key Points
- Fixing a toilet chain does not require any professional help; however, if you’re not confident doing it yourself, there’s no shame in calling an expert.
- Toilet chains are one of the most important parts of the flushing tank.
- The toilet chain connects the lever to the flapper valve, allowing water into the toilet bowl when the toilet is flushed.
- Corrosion and excessive pressure on the chain often cause it to break.
- You can replace the broken chain with a new one in a few easy steps!
The Purpose of the Toilet Chain

In any case, when you push on the handle to flush the toilet, the lever moves upwards along with the chain, which lifts the valve. Once the valve is open, the water rushes into the bowl, flushing the toilet. After it is done, the lever moves back to its original position and closes the valve, stopping the flow of water.
How Do I Know if the Toilet Chain Needs a Fix?
A broken chain inside the toilet is a very common issue. If you notice that your toilet is not flushing properly, simply remove the tank lid and check the chain. You’ll find it attached to the arm of the flush handle and the flapper.
If the chain is broken, corroded, or is too tight or loose, it will not be able to lift the flapper valve properly. And if the valve remains closed, the water will not flow into the bowl, preventing the flushing process.
Toilet Chain Keeps Falling Off (Causes)
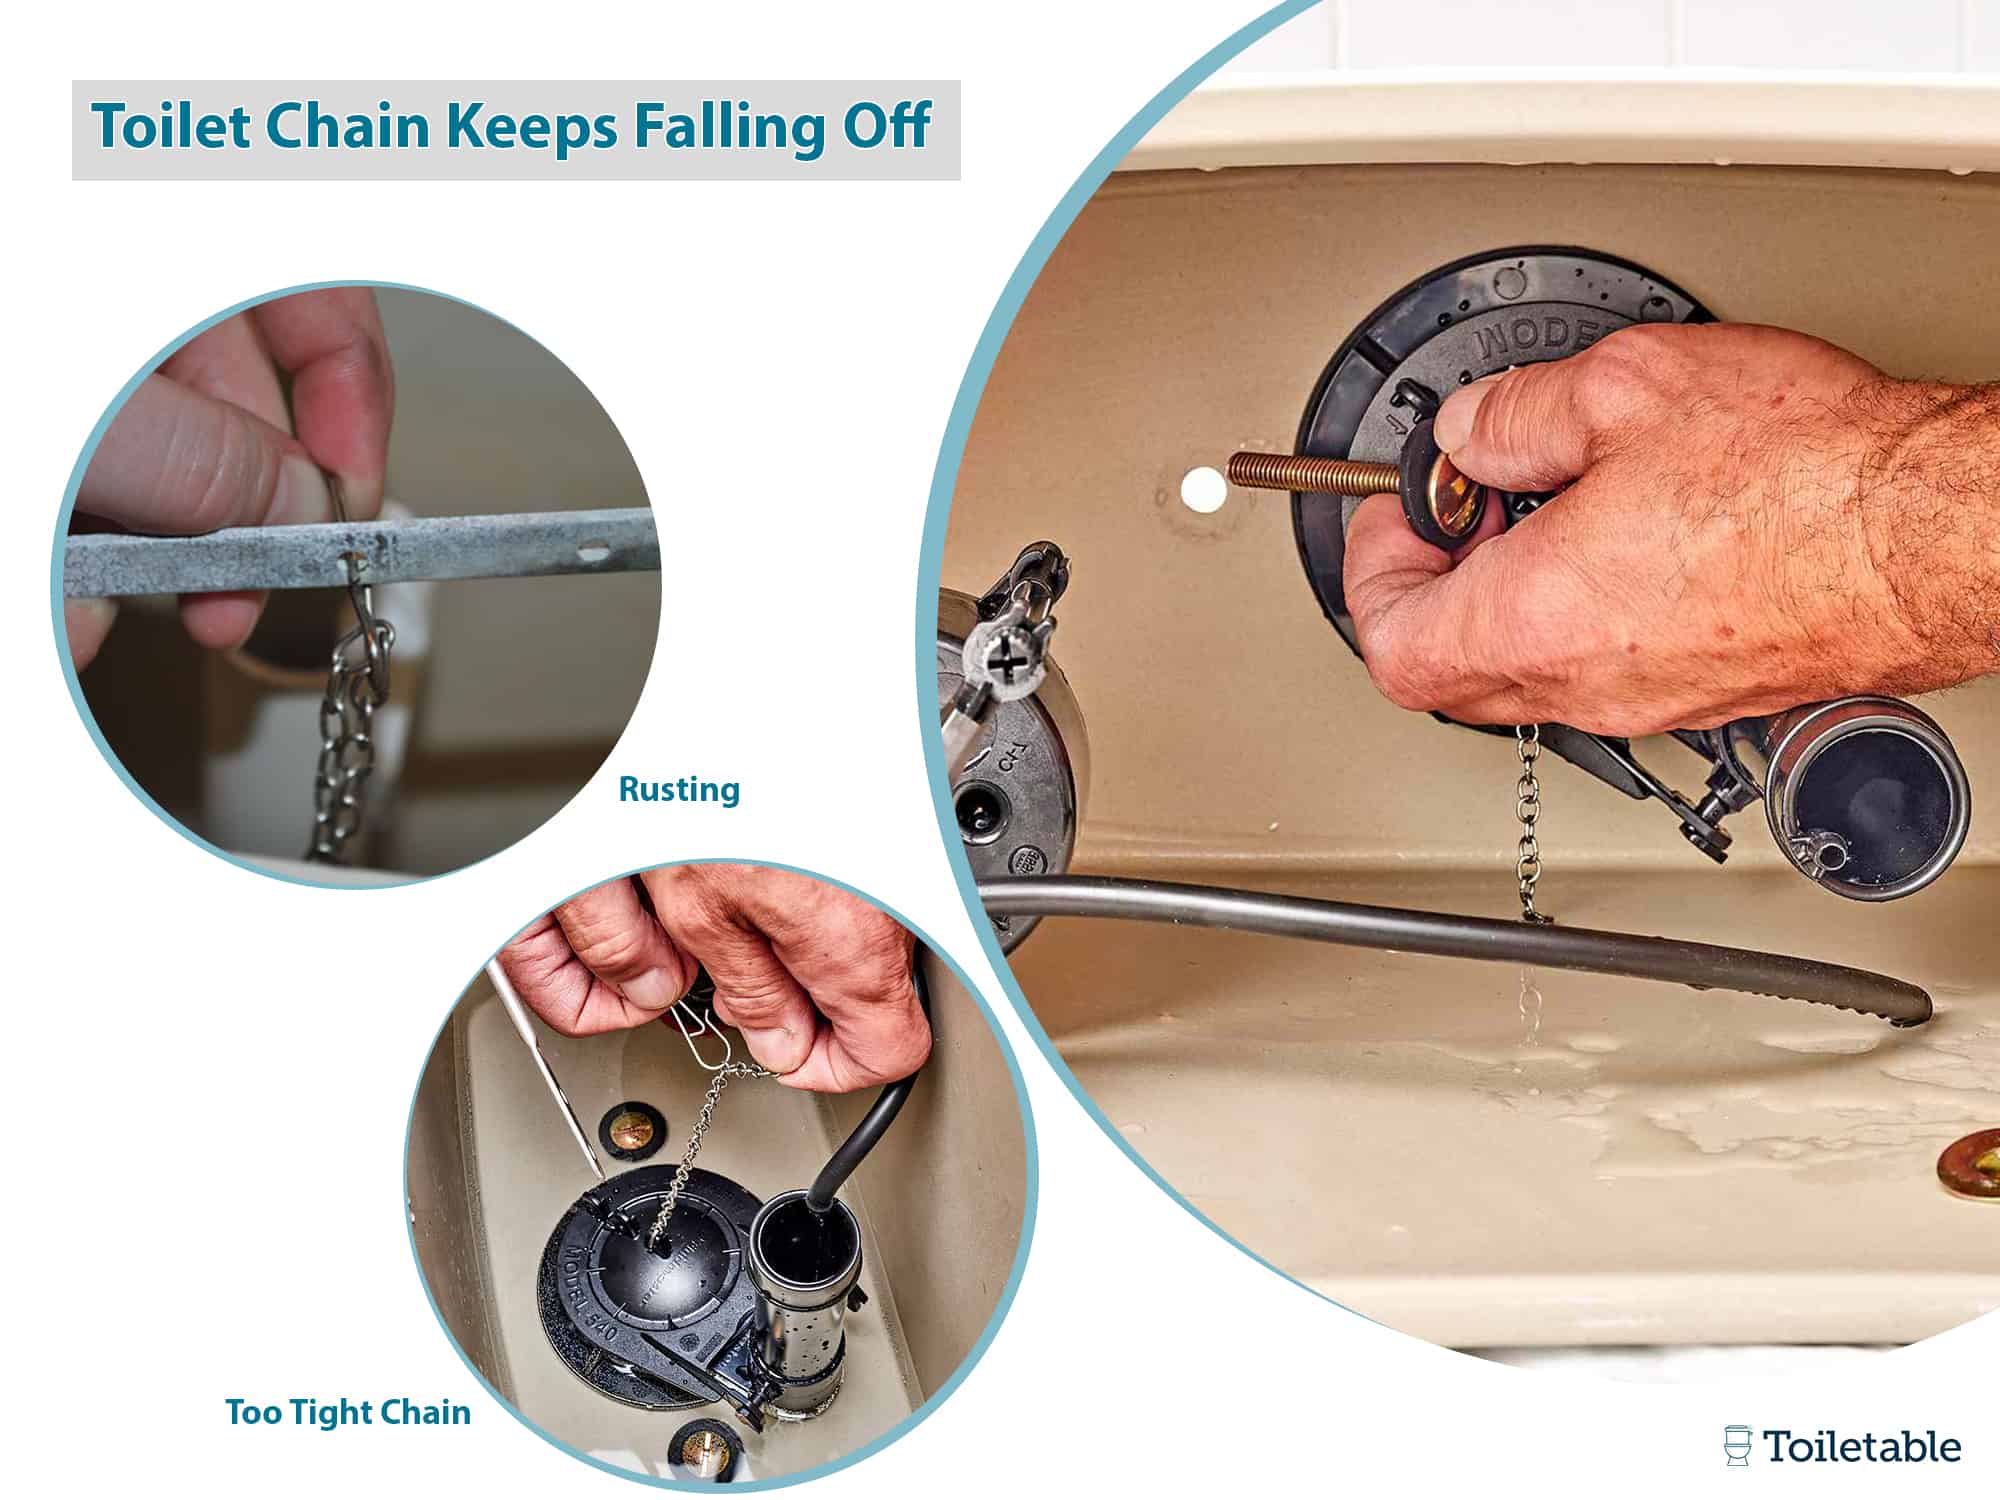
Rust
One of the top reasons behind a broken chain is rust in the tank. The chain is exposed to water inside the tank at all times, sometimes leading to rust. Corrosion slowly weakens the metal over time, and the chain eventually breaks.
Too-Tight Chain
Another reason for a broken chain is incorrect tension. The chain inside the tank must be placed properly so that it is not too loose or tight. If the tension is too loose, the chain won’t be able to properly lift the flapper, preventing water from flowing from the tank into the bowl when the toilet is flushed.
However, when the chain is too tight, pushing down the flush handle puts excessive pressure on it. This strain can cause the chain to snap, preventing the toilet from flushing.
Fixing a Toilet Chain

Tools You’ll Need
Luckily, you don’t need a full toolkit to fix a toilet chain. The items you need to repair a chain are:
- Pliers
- New toilet chain
Step 1: Remove the Lid
The very first step in this process is to remove the lid from the tank. Make sure that you place the lid in a safe place so that it does not fall or break. Use caution; tank lids can be heavy.
Step 2: Turn the Water Supply Off
After removing the lid, turn off the water supply by closing the toilet’s water supply valve. You should find the valve on the wall or the floor near the base of the toilet. Turn the knob in a clockwise direction until it turns off.
Step 3: Drain the Tank
Once you have turned the water supply off, it’s time to properly drain the tank. Lift up the flapper valve by hand to empty the tank. Water will flush into the toilet bowl.
Step 4: Check the Toilet Chain
The next step is to examine the toilet chain. If any link of the chain has snapped or come loose, you can try to reattach it back in place. However, if the chain has broken due to rust or excess pressure, you will have to replace it with a new one.
Step 5: Remove Old Chain & Install New Chain
Remove the broken toilet chain from the tank. The chain is connected to the lever and flapper valve with metal rings and clips. Make sure to remove the chain from these connecting points and put it aside.
Take the new toilet chain and install it inside the tank. Connect one end to the metal clip of the lever and the other end to the flapper valve ring. Make sure that the chain is not too loose or too tight.
Step 6: Close the Lid & Turn on the Water Supply
Lastly, replace the tank lid and turn the water supply back on. Once the tank fills with water, flush the toilet to confirm it is working properly.
Final Thoughts
Nice work—you’ve just repaired a toilet chain all by yourself. We want to congratulate you on the money you saved and the pride you earned by rising through the ranks to DIY toilet repair specialist. We hope this guide has been helpful.
Don’t forget to drop us a line if you have any questions—and keep an eye out for our other guides next time your toilet needs a little extra help.