
One of the most common toilet issues that can arise is when it leaks from the base. While at first this problem might seem minor, it’s actually one you should address immediately in order to prevent unpleasant odor water damage, and even mold growth. So if you notice a pool of water around the toilet base it’s essential to find the root cause and fix it right away.
Let’s dig deeper into how you can find the issue and how to fix it!
Key Points
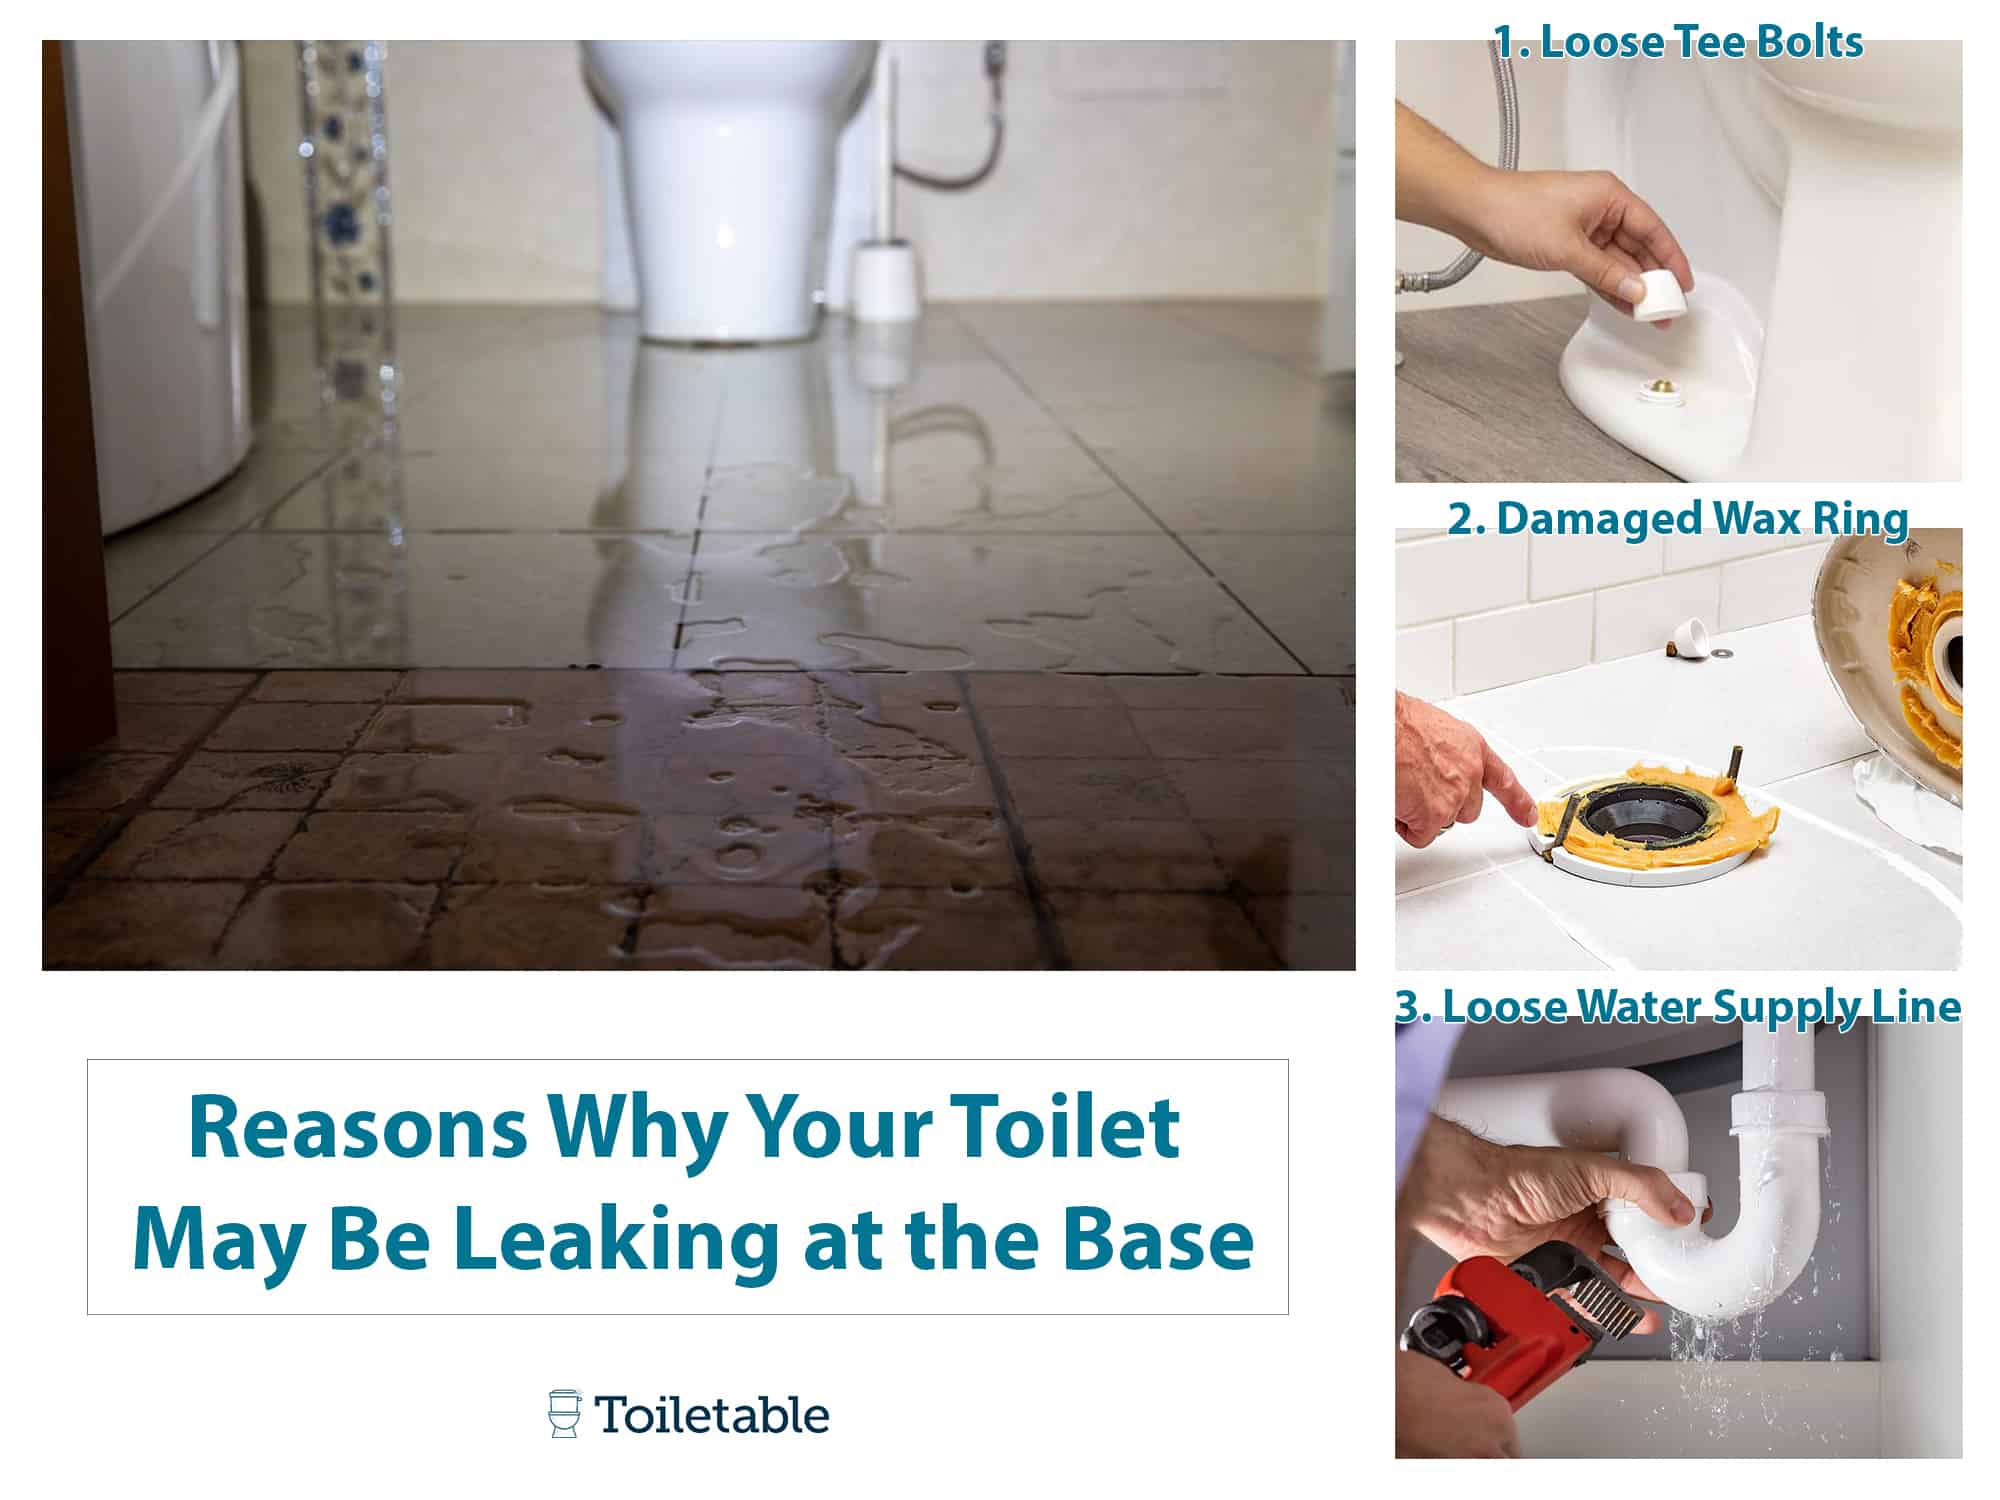
- The most common reason for a toilet to start leaking at its base is worn out or damaged wax rings, cracked toilet, loose toilet bolts, or overall poor installation.
- Start by turning off the water supply. Determine the issue first and then take action.
- Regular inspections of the wax ring and the bolts can lower the chances of leaks.
Worn-out or Damaged Wax Ring
The wax ring is the one that seals the connection between the drain pipe and the toilet. However, over time, the wax can war out, become dislodged, or crack, and this can lead to leaks. If this is the reason for your toilet to leak then you need to replace the wax ring. Here is how to do it:
- STEP 1: Turn off the water supply, either the main water supply, or close the shutoff valve at the rear of the toilet. Flush the toilet to drain the water left inside.
- STEP 2: Unscrew the bolts at the base and remove the toilet.
- STEP 3: Scrape off the wax from the drain pipe flange and toilet.
- STEP 4: Install the new wax ring, just make sure it’s well-centered.
- STEP 5: Take the toilet and carefully press it down onto the wax ring while rocking gently to compress the wax, creating a secure seal.
- STEP 6: Place the toilet back on the flange and tighten the bolts.
- STEP 7: Turn the water back on, flush and check for leaks.
Tip: Instead of the traditional wax you can also opt for more durable material like foam gasket or rubber.
Loose Toilet Bolts
The bolts that secure the toilet on the floor are known as closet bolts. These are located on both sides of the base. If they are loose, the toilet might wobble and can cause the wax ring to break the seal, so water will start to leak. But the fix is super simple:

- Check the bolts, if they are loose tighten them with a wrench, but be careful, you don’t want to overtighten them because you can break the toilet’s porcelain.
- If this won’t fix the problem or over time the toilet starts to leak again, get new bolts and replace them.
Damaged Toilet Flange
The closet flange or toilet flange is the one that connects the drain pipe to the toilet inside the floor. If this is misaligned, corroded, or broken it won’t create a good seal which will lead to leaks. If this is the case here is how to replace the damaged flange:
- STEP 1: Always – first turn the water supply.
- STEP 2: Unscrew the bolts and remove the toilet.
- STEP 3: Check the flange and see if it has any signs of wear or cracks. If it’s indeed damaged, then replace it.
- STEP 4: Make sure the flange is leveled and well-secured.
- STEP 5: Install the toilet back and turn on the water supply.
- STEP 6: Flush and check for leaks.
Cracked Toilet Bowl
A cracked toilet bowl, especially at the base can cause the toilet to leak. These cracks can happen due to accidents that damage the toilet, improper installation, or age. There are two ways to fix this issue – repair or replace:
- STEP 1: Shut off the water supply
- STEP 2: If the crack is very small then you can try and fix it with waterproof epoxy, one that’s designed for porcelain or ceramic.
- STEP 3: Turn on the water supply and flush the toilet. Check for leaks.
- STEP 4: However, if the crack is larger or it’s even compromising the toilet it’s better to get a new toilet and replace it.
Poor Installation
Poor installation can also be the cause of the leak, especially if the floor is uneven, misplacement of the wax ring, or improper alignment. Here are a few things you can do:
- STEP 1: If the toilet level is the issue use a toilet shims to stabilize it.
- STEP 2: Make sure the bolts are tightened.
- STEP 3: Ensure the gasket or wax ring is properly aligned.
- STEP 4: In some cases, you might need to re-install the toilet so that you can correct any errors.
Sweating Toilet (condensation)
Sometimes even if it seems that it’s a leak from the toilet base it’s actually condensation that happens outside of the toilet tank. It happens when in a humid bathroom the tank fills up with cold water, causing moisture on the surface and it drips down to the toilet base. Even this can be taken care of, and here is how:
- STEP 1: Install an exhaust fan or use a dehumidifier to reduce the humidity.
- STEP 2: Use a tank liner to insulate the toilet tank or install a different toilet that it’s anti-sweat which will mix warm and cold water inside.
How to Avoid Toilet Leaks
Proper care and maintenance is the number one thing that will help you avoid toilet leaks. Luckily there are a few ways you can maintain a toilet.
Proper Installation
If a toilet is not installed properly it’ll definitely leak and actually, this is the number one issue that can result in toilet leaks.
So when you are installing the toilet, whether new or putting the old one back (after fixing) make sure to:
- STEP 1: Level the toilet properly. If you don’t it’ll put strain on the wax ring which will lead to leaks.
- STEP 2: During installation make sure to center the wax ring. It has to be aligned so it creates an airtight seal between the drain and the toilet. Faluty wax or misplacement can lead to leaks.
- STEP 3: Align the flange properly and secure it. It must be at the correct height, if not it can damage the seal and the toilet will start leaking.
Inspect the Wax Ring regularly
Because the wax ring is the one that makes a seal between the drain pipe and the toilet with time it can degrade and cause leaks.
Even though you don’t need to replace the wax that frequently it’s good to check it every couple of years. If you see an issue replace it even before it starts to leak.
Don’t Over-Tighten the Bolts
I already mentioned before but here it is again, don’t over-tighten the bolts on the floor. Wait…don’t even leave them too loose. While the too-tight bolts can crack the porcelain the loose ones will make the toilet shift and cause leaks.
What you can do is check the bolts from time to time to make sure they are not loose or too tight. But if you are not sure about how tight the bolts are it’s always better to keep them just a little bit loose to avoid the risk of cracking your toilet.
Check the Water Supply Line
Leaks sometimes don’t come from the toilet base, sometimes they might come from the water supply line and go down to the base. And this usually is a faulty connection. But to avoid this you can check the supply from time to time. If there are some loosen fittings tighten them, and check for corrosion or wear. If the hose looks frayed or cracked replace it with a high-quality one.
Don’t Press too Hard on The Toilet Handle
Constant pressing and jiggling of the toilet handle can tear the internal components of the tank which can lead to leaks.
Make sure everyone at home is on the same page and understands how important is to be gentle with the toilet handle. But if the toilet handle is too hard to press then adjust the length of the chain or just replace it with a new handle.
Perform Regular Inspections
Many homeowners don’t notice leaks on time because most of the time they start with small drips. That’s why it’s important to do routine inspections that will help you catch minor problems before they become big ones.
Check-ups
- Unusual odors – If you notice a sewer-like smell coming from the toilet base, it could mean the seal at the flange or base is broken.
- Wobbling toilet – When you sit, if the toilet seems unstable, or it rocks, check the wax ring or bolts immediately.
- Water around the base – Clear sign that something is wrong, either the wax seal, fringe, or the toilet porcelain.
Bottom Line
With regular inspections and maintenance, you can keep your toilet leak-free. In fact, you can see now that it’s easy to find out what can cause toilet base leaks, and now you know how to fix them. We hope that this guide will help you fix it without any future issues. Just make sure to follow the preventive measure tips and to keep your toilet problem-free for longer.