
We don’t usually think about our toilets or how they work until the day they actually stop working. This means that most of us are unprepared and scramble for how to fix whatever issue our toilet is dealing with.
Having no running water will stop your toilet from working. This may be due to the water supply being cut off, a power outage, or a plumbing issue.
So, what do you do if you find yourself needing to flush the toilet when there is no water supply?
Fortunately, we at Toiletable are here to help you with all things toilets. After reading about the methods outlined below, you’ll know exactly how to get your toilet to work even when there is no running water. We’ll also provide additional quick tips and explain why these methods work.
Key Points
- Two simple methods to manually flush a toilet using stored water in buckets or a bathtub.
- In order to flush, a toilet bowl needs to be quickly filled with enough water to push water and waste down the drain.
Flushing a Toilet When the Water Is Off

To start, most toilets need to have a full tank of water to flush properly; toilets automatically refill their tanks after each flush. Therefore, even with the water supply cut off, your toilet will likely still have a full tank of water for one more flush.
Nevertheless, if you’ve already flushed since the water was cut off and there’s no residual water left in the tank, you can still trigger a flush by adding water manually. There are a couple of different methods to do this.
Flushing a Toilet Without Running Water
Trying to get by without your water supply can pose a number of challenges. However, the good news is that you can use and flush your toilet even without running water.
There are two main methods to try, although both require access to water. If you already know that you won’t have access to water for a while, we recommend preparing in advance by stockpiling water so you’ll have enough available.
You can store water in your bathtub, buckets, or other containers. You’ll want to use at least one gallon for the flush methods below, so be sure to save as much as you think you’ll need.
1. Bucket Pour Method
To flush the toilet with a bucket of water using this method, follow the below steps.

- Fill a bucket with at least one gallon of water. Make sure that you can lift the bucket. One or two gallons of water will be enough to fill a toilet bowl of a newer toilet. At least three gallons of water will be needed for older toilets.
- When you are ready to flush, without spilling any on the side of the toilet, pour all of the water as quickly as you can into the bowl.. Make sure not to pour slowly, as doing this will just fill the bowl with water until it overflows. The sudden flow of water should trigger your toilet’s typical flush, removing any waste.
- If this approach triggers a flush but doesn’t fully clear the toilet, wait a minute or two and then try again.
This method creates enough pressure to force the toilet’s contents from the bowl and through the plumbing pipes. This method is the quickest and simplest method, especially if you have enough water stored.
2. Tank Refill Method
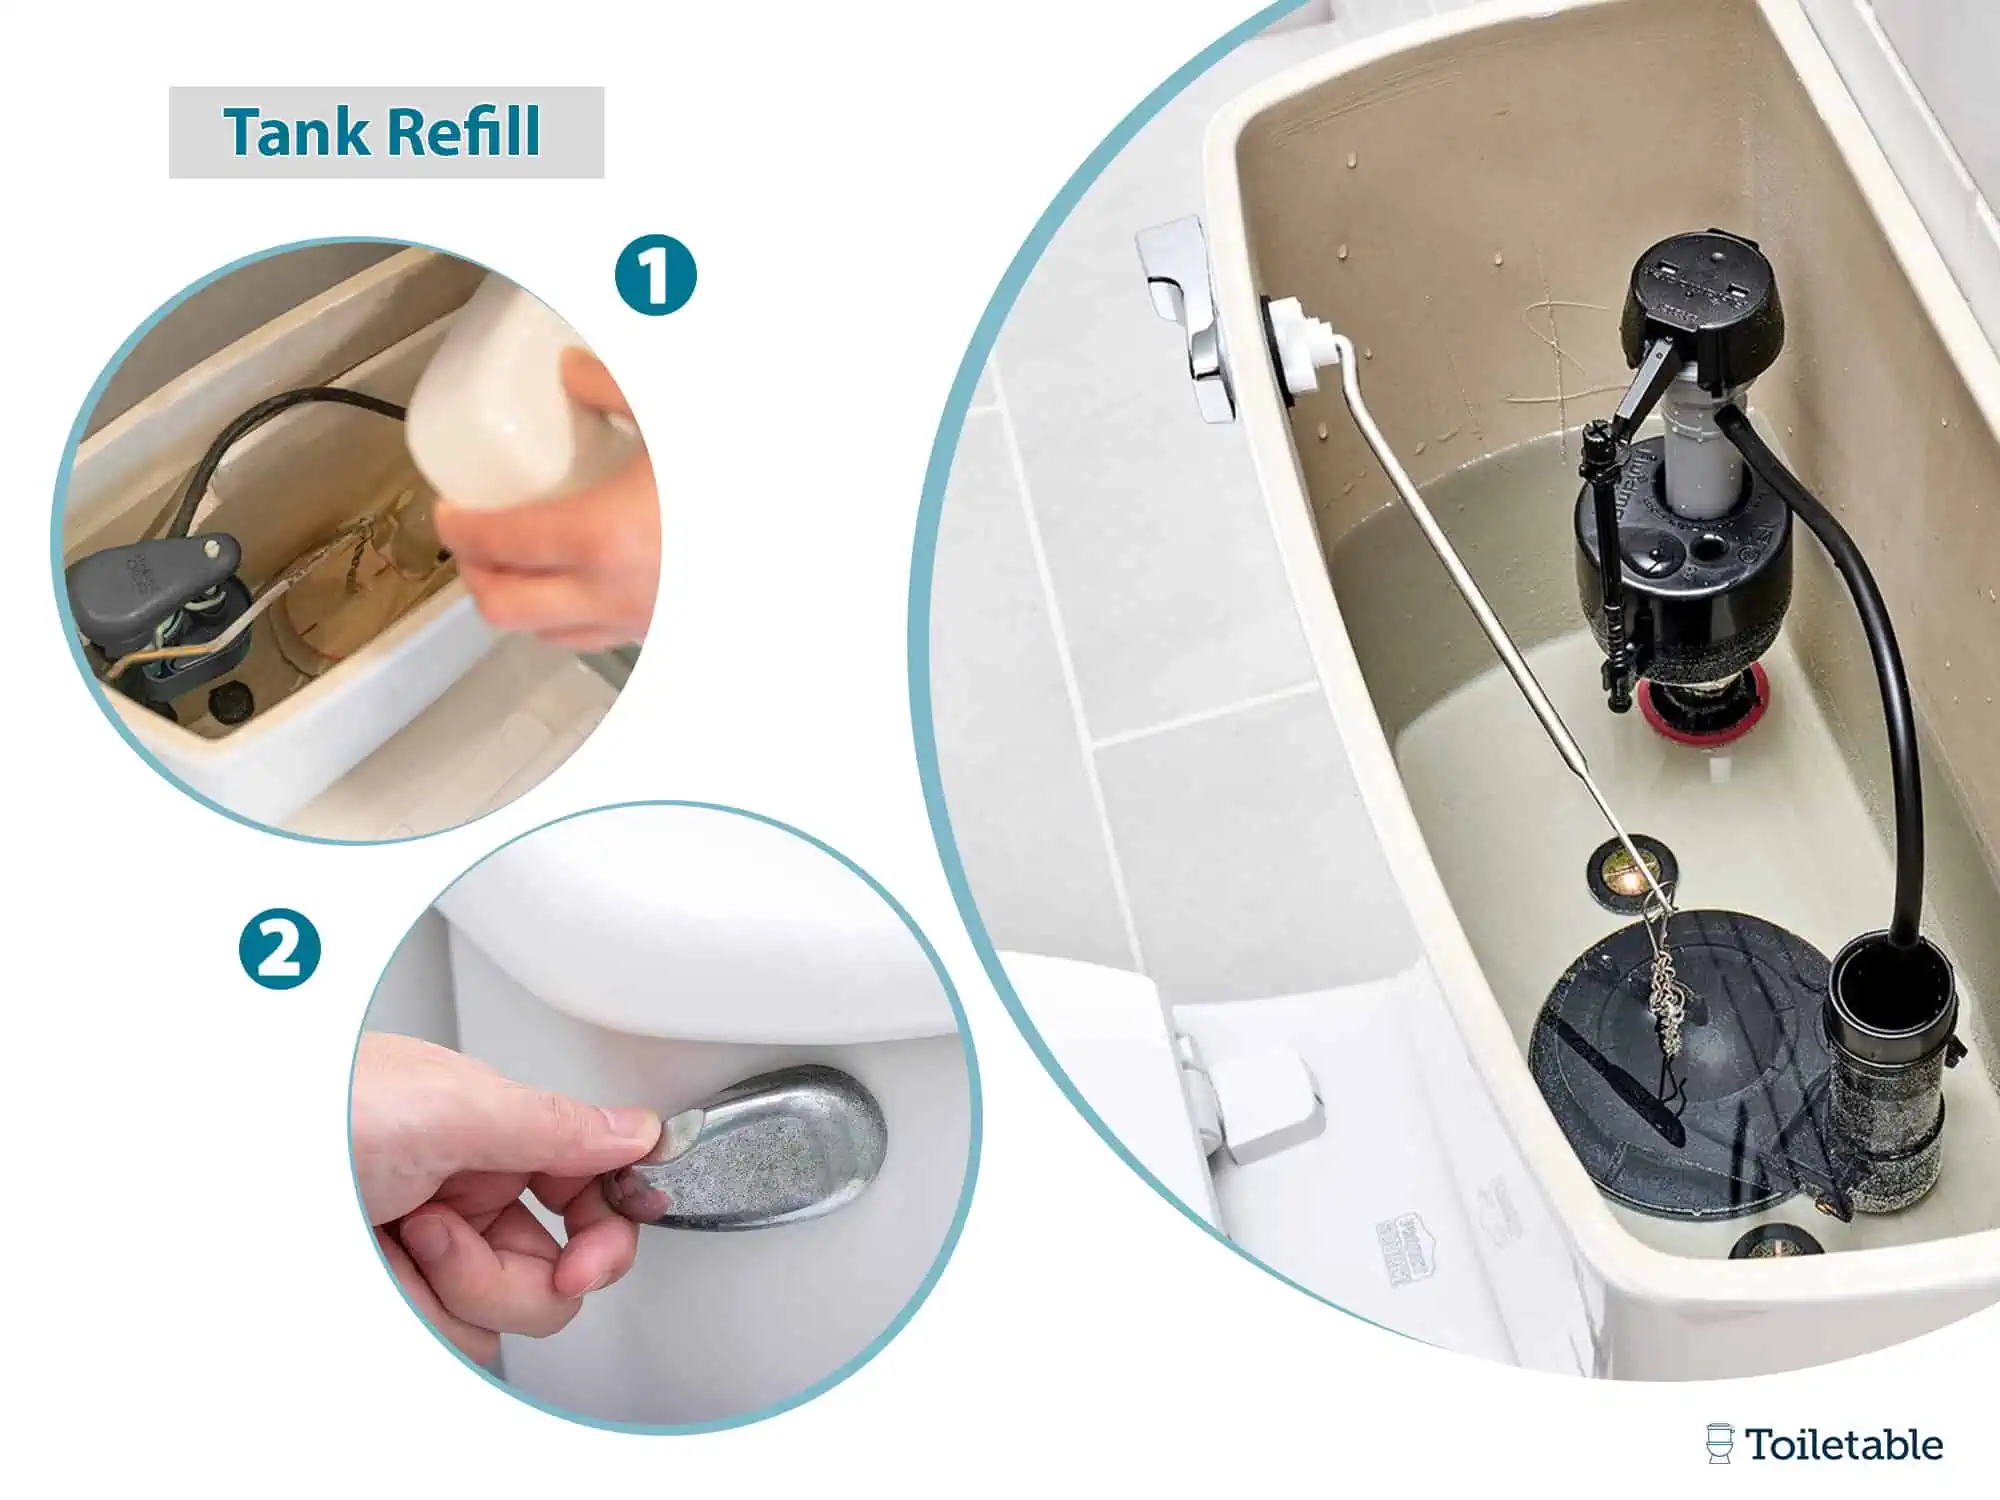
Another method you can use to flush your toilet when there is no running water involves refilling the toilet tank directly.
- Lift the lid from the toilet’s tank. Fill the tank with water manually until it reaches the overflow line.
- Put the lid back on the tank and press down on the flush handle to flush like you normally would.
If you still are unable to flush after pressing the handle, there may be an issue with the toilet flapper. Located at the bottom of the tank, this flapper seals over the flush regulator. Attached to the flapper is a chain that connects to the handle arm. When you press the handle, this flapper is pulled upward by the handle arm, releasing water from into the bowl.
The most likely reason the flapper isn’t working is that the chain is not attached to the handle arm. Grab the end of the chain and hook it back onto the arm, leaving some slack. The flush handle should now work. If the handle still doesn’t work, you might need to replace the flapper. Until then, manually pull the handle arm up to release the water into the bowl.
Note: Once your water supply starts working, you can troubleshoot a slow filling tank using this guide.
Manual Flush Action Explained
The above methods create a siphon vacuum when water is forcefully added into the bowl. The increase of water in the bowl forces wastewater through the trapway by a natural siphonic vacuum action. Gravity plays a role in this action too.
Why Do Toilets Need Water to Flush?
When the flush handle is pressed down to flush, the chain connecting the handle arm in the tank lifts the flapper up. This opens the hole in the bottom of the tank to allow the water into the toilet bowl.The water then flows through the rim of the bowl and floods the bowl until the contents inside are forced through the siphon jet, the hole at the bottom of the bowl. The water and the waste are then drained through the trapway into the connected plumbing pipes.
It’s important to note that this process requires enough pressure to successfully force any waste down the drain. As such, you’ll want to make sure you’re using an appropriate amount of water to create enough pressure. Pouring only a small amount of water into the toilet bowl will not create a flush because it won’t be forceful enough to fill the siphon and trigger the flush action.
Bottom Line
Not having running water in your home doesn’t need to cause you additional stress, particularly when it comes to maintaining access to a working toilet. With a couple of buckets filled with water, you can flush your toilet manually using the methods covered above with no trouble at all.
Leave a Reply