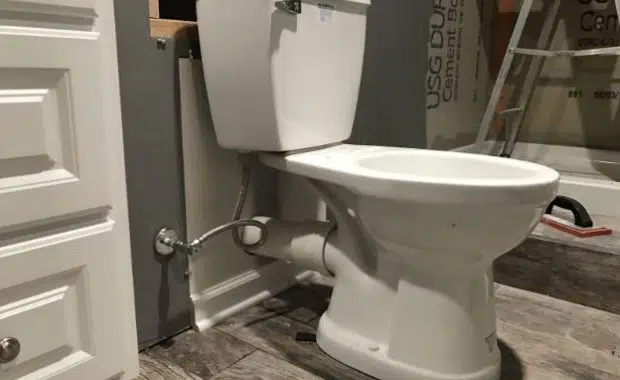
Basement Install Toilet Guide

basement toilet install

Installing a toilet in your basement is an excellent way to maximize your living space. It can transform your ground floor from a drab storage area into another full story of entertainment. 

Placing a restroom on the ground floor isn’t necessarily difficult, especially if you already have a sewage system and main water supply (as most homes do). However, when the main line is above the basement level, homeowners can run into issues when placing a toilet on the ground floor. 

In 1665, Isaac Newton discovered gravity. If you attempt to install a toilet below the main water line of your home, Newton’s discovery may cause you quite a bit of hassle. When you flush a toilet on any other level of your home, gravity helps move the waste into sewage. However, when this line is above your new basement restroom, gravity will work against you. 

Never fear; there are ample solutions to install a fully functioning toilet below the main water line of your home. Let’s get creative and expand your home living space to the ground floor. 

Pro Tip: Only attempt this project if you have some DIY experience and the proper tools. If not, a plumber is just a phone call away. 

Issues with a Basement Toilet Install

Pipe Issues

Sometimes, the main water line of your home may not be located in your basement. This can make it excessively difficult to install a toilet and may cause you to want to give up on the process entirely. Don’t do that – there are plenty of unique solutions like upflush toilets and composting options that our bathroom experts know all about. 

Concrete Issues

We know, breaking concrete basement floors can be quite an ordeal. It often requires more than one person and a skill level well beyond the basics. To install a basement toilet, breaking concrete is often necessary to access drain lines. This goes above and beyond your average DIY project and definitely should not be done by beginner home improvers. 

The Basics (Installation)

Install Step 1: Locating Rough-in and Plumbing

The first step to installing a toilet is locating the rough-in and plumbing connections. In most cases, the rough-in will be between 10 and 14 inches from the wall, which makes it easy to find. If you are not versed in toilet talk, a rough-in is where plumbing lines enter a house, but final connections have not yet been made. This is where you will connect your new toilet lines to. 

You must also find the water supply pipes. They tend to be located around nine inches above the floor, usually behind the drain. In some cases, a flange will already be installed, but it could be installed too high or too low. Especially in older homes, locating these important lines may be tricky. 

If you’re getting frustrated trying to find the rough-in lines, this video can help provide some clear direction. 

Pro Tip:  If the lines are installed too high, you can simply cut them down and add a new flange. If it’s installed too low, you will need a flange extender, which you can find at a relatively low price in most hardware stores. Fixing issues does not have to cause stress!

Install Step 2: Preparation

The golden rule of plumbing work: always turn off your home’s water supply before getting started. Unless you want to get doused in water and potentially flood a room or two in your home, that is. 

Pro Tip: Some homes require the utility company itself to cut off their water line. Check with your provider to see if you can do it yourself or not. 

Install  Step 3: The Toilet Flange

A flange is a pipe that mounts a toilet to the ground and connects it to the drain pipe. When installing the flange, the first thing you must do is inspect the drain pipe. A drain pipe comes in many shapes and forms. It may be metal, ABS, or another material entirely. Whatever you do, make sure the flange is made from the same material to avoid a toilet disaster. 

If your drain pipe is not at floor level, you need to cut it down. Once you do this, remove the cap with a hammer. 

Pro Tip: Toilet drains don’t smell like a bouquet of roses. Stuff it with a cloth to avoid a foul smell wafting around during installation. 

All toilet flanges have four holes. You will need to ensure that two of the four holes are at the same distance from the wall so that the toilet can sit straight. With a hand drill, prepare the holes in the flange, and then use the hammer drill to make holes in the floor. Clean the drainpipe and the flange with fine sandpaper and add adhesive to both ends. 

Pro Tip: Make sure to buy the proper adhesive based on your flange and drainpipe material.

Next, insert the flange, ensuring it has enough adhesive applied. Fix the flange to the ground using concrete screws, and your flange is installed!

Install Step 4: The Shutoff Valve

Installing the shutoff valve is pretty simple – similar to the flange, you’ll start by turning off your water supply. Once you do this, cut the end of the pipe and de-burr the rough end with sandpaper. Slide the compression nut onto the pipe. Make sure that it goes as far as possible. 

Once the compression ring is in the correct position, ensure that it fits properly, and then attach the compression valve over the ring. Finally, tighten the compression nut and inspect it to ensure that nothing leaks. If everything is fine, that’s it – you have successfully installed the shutoff valve.

Install Step 5: The Toilet

Pro Tip: It’s a good idea to have someone help out with this step. Toilets are a two-person job!

To start installing your new basement toilet, install the closet bolts. If you have any plastic clips to hold the bolts in place, add them as well. After this, install the flange seal. Be careful here – you can use wax for the seal, but if there is no one around to help you out, it’s better to use a seal with no wax. Put the tank in the proper position, and make sure that you lift it over the closet bolts. 

Pro Tip: Install the bowl first and then the tank.

Screw the nuts onto the toilet bolts carefully. If you tighten them too much, you might break the bowl. Then, connect the water supply somewhere between the shutoff valve and the fill valve and turn on the water. Inspect for any possible leaks. If everything is fine, your toilet is ready for use!

Install Step 6: Covering Exposed Pipes

So you just installed your stunning new toilet, but unsightly exposed pipes are now lining your restroom. Never fear, there are three methods to solve this problem.

Method 1: Cover the pipes with fabric or decorative tape. This is the easiest and least involved method. It is perfect for those who don’t mind the retro look of exposed pipes and want an art project instead of something more tedious. 

Method 2: Paint the pipes to match the bathroom color, or paint them with an accent color to add a unique look to your bathroom. We believe that this is the best method to use. It gives pipes a clean look without having to break out the construction tools. 

Method 3: Hide the pipes by building a box to cover them.

Note: Depending on your municipality, you might also need to install a fan in your bathroom. A fan is a great way to control moisture and avoid bad smells in your bathroom, so we recommend doing this anyway. 

Basement Toilet Solutions

In some cases, the drain line will be above your ground floor. This can make installing a basement toilet difficult. In even more cases, you may not have the skillset, manpower, or time to break concrete and access drain lines in your basement. Don’t stress. There are ample solutions to get that basement toilet anyway. 

Solution 1: An Upflush Toilet

We believe that an Upflush toilet is the best solution for anyone looking to install a toilet anywhere in their house, hassle-free. Upflush toilets have the same features and usage of regular toilets. The only difference is where the waste goes when you flush. 

While typical toilets use gravity to send waste off into sewage, an upflush toilet has a special pump behind it with the purpose of waste disposal. It takes up so little space that bathroom visitors may not even notice the difference between this and a commonly installed toilet. 

When an upflush toilet is flushed, the waste is ground down using a macerator and then fully disposed of, making it empty for the following toilet user. 

Installing an Upflush Toilet

Installing an Upflush toilet is a much easier process than standard toilet installation. Simply drill the macerator into the floor, plug it into an outlet, connect drainage to rough-in lines using PVC piping, and attach the drainage from the toilet to the macerator using a hose clamp. Attach free air vents, slip the discharge tube into the macerator pump, and position the upflush toilet. 

Pro Tip: Zip ties can help keep the drain connecting the toilet to the pump in place. 

Solution 2: A Composting Toilet

Composting toilets are completely dry, meaning you do not need to connect them to plumbing at all. They simply compost human waste in a low cost, low maintenance manner. Assembly takes seconds. All you need to do is slide the pieces of the toilet together and add a carbon additive to digest the waste. 

Composting toilets do not create sewage (or a biohazard) as they separate liquids from solids. Believe it or not, these toilets do not smell (this is a common misconception). Waste goes into a secure chamber with a closeable lid. You also only need to empty them every few months, the composting process does most of the hard work for you. 

Frequently Asked Questions

Do I Need a Special Toilet for My Basement?

Not exactly. However, as you can see, the installation process can be quite different than when installing a toilet in another place in the house. This is helpful to keep in mind when picking out your toilet. If you do not want to (or cannot) go through the normal toilet installation process, invest in an upflush or composting toilet. 

What Is the Total Cost of Adding a Toilet to the Basement?

The average price for installing the toilet in your basement is around $1,500. However, the price can greatly differ depending on the model you want to install and if you wish to do it by yourself or call the plumber. In some cases, the cost could go over $2,000.

Is there a way to Install the Toilet in a Basement without Breaking Concrete?

If you don’t want to break the concrete, you can install an upflush toilet or composting toilet. Both of these options require minimal installation and are great options for a low hassle job. 

Bottom Line

Adding a toilet to your basement isn’t difficult. Make sure that you have all the right tools and an extra set of hands. As long as you carefully follow the installation guidelines for your toilet, you should have your new toilet installed in no time!

How to Install a Toilet Guide

installing a toilet

Most think that installing your own toilet is difficult, right? Wrong!

We have created an easy to follow  step-by-step process  that will guide you from start to finish of installing your next toilet.

Toilet Installation Process (Easy Step-by-Step)

All you need is:

Before you start:

installing a toilet

Take Measurements

As you shop for a new toilet, there are a few  important measurements  to take into consideration. Don’t risk buying a new toilet that won’t fit in your bathroom.

picture displaying toilet dimensions and measurements in white bathroom Here are 4 main measurements you’ll want to be sure of before purchasing your new toilet:

1. Rough-In

Make sure you know the rough-in measurement of your old toilet unit. In most cases, the waste pipe measures roughly 12-inches from the wall, but some can measure between 10 and 14-inches.

If you select a toilet whose rough-in doesn’t match the size in your bathroom, the pipes won’t match up and you won’t be able to install the new toilet.

2. Toilet Dimensions

Beyond the rough-in, you’ll want to measure all the key specs for your old toilet. Be sure to measure from the wall and not the baseboard. Keep in mind any water supply lines as well.

Particularly for toilets with a broader base, it’ll be helpful to confirm how much room you have besides the water supply line on the floor to make sure the new toilet will fit.

3. Space Around the Toilet

Another factor to consider is the available space for the toilet within your bathroom. We recommend that you measure from the bowl to the wall or any other appliances on either side of the toilet, to make sure the toilet will fit in the available space.

4. Toilet Bowl Shape

You’ll also want to pay attention to the shape of the bowl of your new toilet. Most toilet bowls are elongated for the sake of comfort.

However, if you are limited on space, consider going for a round bowl, which takes up less room and will be more likely to fit in a smaller space.

Tools and Preparation

toilet tools needed for an install, plumber with wrench Be prepared with the  necessary equipment before you start the job . You’ll want to gather all of your tools from the beginning. These tools include:

  • Locking Pliers
  • Slip joint pliers
  • 4-in-1 Screwdriver
  • Cordless drill
  • Adjustable wrench
  • Caulk gun
  • Level
  • Tape measure
  • Utility knife
  • Rags
  • Shop vacuum
  • Hacksaw

Besides these tools, you will also need some other materials. Some of these may come with your new toilet, but either way, it’s helpful to gather these materials before beginning the installation process.

Don’t forget, otherwise you may have to stop midway through installation to go to the store for additional parts. The additional materials you may need include:

  • Toilet flange
  • Brass toilet bolts
  • Wax ring or foam gasket
  • Silicone caulk
  • Plastic toilet shims
  • Access to water

With these materials in place, let’s now embark on the installation. There are two major steps for this process – removing the old toilet and then installing the new one.

Removing Old Toilet (Easy Steps)

Download the PDF version of the removal step-by-step guide.

The first step after buying a new toilet is removing the old one. As a whole unit, including the tank and the bowl, a toilet can be pretty heavy. 

Therefore, if you have a two-piece toilet, you can make your work easier by removing the tank first and then removing the bowl. If your toilet is a one-piece model, however, you’ll likely want to get help from someone else as one-piece toilets can weigh 80 lbs or more.  Heavy lifting?  I would say so!

hands removing and lifting a toilet from floor, 7 collage of photos showing removal steps

STEP ONE: Drain Water

Start by turning off the water supply line to the toilet. You should be able to turn the supply line on and off using a valve on the line itself. Once you’ve cut the water supply, flush the toilet, which will remove any leftover water in the tank. For any residual water, use a sponge to completely dry around the toilet.

STEP TWO: Lift Off Toilet Tank

Once you have disconnected the water supply line, place a bucket on the floor to catch any water that may be remaining in the pipes or bowl. Then, unscrew the nuts located on the bottom of the tank. At this point, you should be able to lift the tank off completely.

Since the tank is at great risk of cracking, always wear gloves as a safety precaution. It can also be helpful to lay out a towel, otherwise have a place ready to set down the old tank once it’s been removed.

STEP THREE: Uninstall Bowl

For this step, dry any excess water, loosen and remove the nuts that secure the toilet bowl to the floor. You can then carefully lift the bowl and remove it from the space. It’s also important to note that if you have a one-piece toilet, you’ll need to do steps 2 and 3 together, as the tank and bowl cannot be separated.

STEP FOUR: Remove Old Wax Ring

Since wax rings are not designed for reuse, you will have to remove the old one from the previous toilet. To remove the wax ring, use a putty knife, then start scraping off the old wax. After the scraping, take a rag and stuff it into the open hole to block sewer gasses and prevent objects from falling into the drain.

STEP FIVE: Check Flange

checking a toilet flange

Finally, once you’ve removed all the parts from the old toilet, the last step is to check the flange. This step is also for when you repair or replace the flange if needed.

NOTE: To repair the flange, start by removing the old closet bolts from the flange. Then, make any necessary repairs to the flange itself. You can often find repair kits at your local hardware store to help fix your broken flange. Alternatively, if you need to replace the flange completely, you can buy a replacement part to fit inside the pipe and create a tight seal once again.

Good on you, you’re halfway there! Now let’s move on to installing your brand new throne!

Install Your New Toilet (Easy Steps)

Download the PDF version of the installation step-by-step guide.

With your old toilet cleared and space available in your bathroom, you can now install your new toilet in no time in these easy to follow steps.

installation of a toilet, 6 photos, toilet parts, wax ring, plumber tightening tank bolts

STEP ONE: Install New Bolts

To install the new closet bolts, simply slide them into the slots on the flange. You must use washers or nuts to hold the bolts securely on the flange. Tightening these washers will make it easy for you to align your toilet as you set it in place.

If the bolts are rusted, please try the steps outlined in our rusted bolt removal guide here (link to guide)

STEP TWO: Apply New Wax Ring

wax seal installation for installing a new toilet

Next, you’ll want to install the new wax ring on the base of the toilet bowl. Start by placing the new bowl upside down on a towel, so you can easily access the base. Then, run the wax ring under warm water to soften it. Once softened, gently press the wax onto the base of the toilet bowl.

STEP THREE: Install Toilet Bowl

Once the wax ring is set, you can now remove the rag that’s been blocking the drain. Then, carefully lower the toilet bowl over the new bolts. Make sure to lower the bowl straight down over the flange, slowly rocking it in place. It’s important to be slow and careful at this point to avoid causing any damage to the wax ring.

Lastly, once you have the bowl in place, press down firmly down on the bowl, ensuring that it is square with the wall.

STEP FOUR: Secure Toilet Bowl

As the next step, add the cap bases, nuts, and washers to the closet bowls. Ensure that the right side of the cap bases faces up. It’s also a good idea to alternate tightening the nuts so you keep the pressure even across all points.  However, be careful to not tighten the nuts excessively as the bowl can easily crack. Once you have everything tightened, you can use a hacksaw to cut off the excess bolt.

STEP FIVE: Get Tank Ready

Once the toilet bowl has been secured, the next step is installing the tank. You’ll want to start by flipping over the tank so you can install the bolts that will secure it to the bowl. Ideally, the bolts ought to slip into slots located on the tank. After installing these bolts, you’ll then install the rubber gasket to the tank’s base.

STEP SIX: Securing Tank In Place

Now, set the tank in place on the bowl while hand-tightening the nuts on the bowl. Once again, be careful not to over-tighten them while still ensuring that the tank is level. If the toilet you’re installing is a one-piece toilet, you won’t need to worry about this step or the previous step, because the tank and bowl are already connected.

STEP SEVEN: Reconnect Water Supply

With the full toilet now installed, it’s time to reconnect the water supply and double-check everything. Reverse the step you took previously to cut off the water supply. In most cases, you’ll be able to switch the water supply back on using a valve on the supply line that connects directly to the toilet.

STEP EIGHT: Check For Leaks

Once you connect the water supply and turn on the water, you’ll want to check for any leaks around the gasket base and supply line. If you spot any leaks, the bolts are likely too loose, so you’ll want to tighten them some more.

If you’ve tightened all the bolts and you notice parts are still leaking, you may have to take the whole tank off and check that the gasket has been installed correctly.

You should also flush the toilet several times and check the area around the base for any leaks. If there is a leak, you may need to install a new wax ring to ensure everything is fully sealed.

STEP NINE: Install The Seat

Lastly, after confirming there are no leaks or other issues, the last step is to install the toilet seat. Most seats should come with basic, straightforward installation instructions. Typically, you’ll only need a screwdriver to install the toilet seat. Then, your new toilet is ready to go!

Congratulations!

You’ve saved yourself toilets of cash and you’re now DIY royalty!

What are you going to do with all your cash? Stock up on some rolls, take your special someone out for dinner or get that new gear – whatever you do with it, know that you did it yourself. Well done!

Our Final Words

As you can tell from our easy to follow step-by-step guide, it’s easy to replace your toilet with a brand new one! You should now know everything you need to about replacing and installing your new toilet. We hope you take it on and join the royal line of DIY toilet installers, trust us, the feeling is well worth it!

Good Luck and get in touch if you need any guidance, or even for a trumpet call halfway through. We will get you back on track in no time!

Properly Install a Toilet Seat (Simple Steps)

seat removal and install

Contrary to popular opinion, replacing or installing a toilet seat is a relatively easy affair. All you need are some basic tools and you’ll be able to replace your toilet seat at home in no time. Whether your current seat is too old, broken, or you just want a new style, use our simple guide to install a new toilet seat quickly and easily.

This article will breakdown the different steps involved in removing and replacing a toilet seat. Read on to review everything you need to know!

Installing a Toilet Seat (Tools Needed)

If you want your toilet seat removal and installation process to be as straightforward as possible, it’s helpful to gather all of the materials and tools needed for the job before you begin. These items include:

  • The new toilet seat (see additional tips in step 2!)
  • Small hacksaw (for the old seat)
  • Socket wrench (for the old seat)
  • Flathead screwdriver
  • Putty knife (for the old toilet seat)
  • Basin wrench or Tongue-and-groove pliers
  • Protective gloves
  • Tape measure
  • Knee pads
  • Protective goggles

With all the tools and materials in place, you are now ready to remove your old toilet seat and replace it with a new one. If you’re installing a toilet seat on a new toilet that doesn’t already have a seat, you can skip to step 4.

1. Measure the Toilet Seat

hands holding out a measuring tape

The first important step is to confirm your toilet’s measurements and ensure you have the correct replacement item. For this step, use a tape measure to get the correct size and shape for your toilet. Your new toilet seat should line up with these measurements.

In particular, check the distance between the bolt holes in the toilet bowl. Then, ensure that the distance between the bolts on the replacement seat is the same, otherwise, you won’t be able to install your new seat.

2. Pick the Ideal Toilet Seat

Person making a frame with the hands

Note that toilet seats are available in two different styles: rounded ones and elongated ones. The style of seat should match your toilet’s shape – basically, you can’t use a rounded seat on an elongated toilet bowl, and vice versa. Once you’ve confirmed the right style, you can consider additional features. For example, ‘whisper close’ seats feature special pads at the bottom to prevent them from slamming on the toilet bowl.

You should also keep in mind that toilet seats come in different colors. Traditionally, people select a toilet seat that matches the toilet bowl. Most toilet bowls and seats come in the standard white, but you can also pick a seat with a contrasting color like blue to deliver a bold statement.

Check out our full toilet seat review for our top 8 toilet seat picks!

3. Remove the Old Seat

hand unscrewing toilet seat

Now that you’ve picked your new seat and confirmed it will fit on your toilet, it’s time to remove the old seat. In most cases, toilet seats are attached with fittings held together by two bolts. These bolts are normally hidden at the back of the seat by two protective caps.

To access these bolts, use a flathead screwdriver to remove the plastic caps. Keep in mind that the process may be harder for older seats that have been around for a while, so you may need some elbow grease to remove a particularly old cap.

Once the caps are off, you’ll see the top of the bolts holding your seat in place. The bolts will be sticking out of the toilet, held firmly in place by two nuts. You’ll need to unscrew these bolts to remove the old toilet seat. While unscrewing the bolts with your screwdriver, use the pliers to hold the nuts in place. After you’ve unscrewed the bolts, you should be able to lift away the old toilet seat, leaving room to install the new seat.

There may be some minor differences depending on your specific toilet seat, but you should be able to remove almost any toilet seat using the steps detailed above.

4. Steps Before Changing a Toilet Seat

Before diving into this DIY project, we do want to highlight a few hygiene precautions to keep in mind.

Clean Before and During the Process: we recommend doing a quick wipe down your toilet and particularly the seat before you remove it. Then, after you’ve removed the old seat, do an additional cleaning of the exposed toilet bowl surface using an anti-bacterial spray before you install the new seat.

Wear Protective Gear: throughout the process, you can wear gloves to help keep your hands clean especially while you’re working on parts connected to the toilet. Don’t forget to wash your gloves after using them as well so they’re clean for your next use!

Wash Up After: Once you’ve installed the seat, it’s always a good idea to use an anti-bacterial handwash to keep your hands clean. You can also spray any tools you used with anti-bacterial cleaner as well so they’ll be ready to go for your next DIY adventure.

5. Fitting the New Toilet Seat

With the old seat out of the way, it is now time to install the new one. Typically, as long as you purchased a new seat for the replacement, it should come with all the fittings you’ll need.

Start by assembling these fittings so they’re ready to go when you place the toilet seat. In most instances, the package features a set of instructions to guide you through the assembly.

Next, attach the new fittings to your toilet, using your hands to tighten the nuts on the bolts.

We advise against over-tightening at this point because you may need to make adjustments after you test the seat.

Once the fittings have been installed, place the new toilet seat over your toilet, lining up the fittings to the back of the toilet seat. Set the seat such that it is central to the bowl, and be sure to quickly test the seat and make sure it’s lined up correctly.

You can adjust the nuts as needed to tighten the seat or shift the position. Once you’re satisfied with the new seat on the toilet, you can finish tightening the nuts so everything is held firmly in place. You’ll want to have either pliers or a wrench handy to finish this last step.

Then, that’s it! You’ve installed your new toilet seat!

Installing a Toilet Seat vs. Bidet Seat

Not everyone can tell the difference between a bidet and a regular toilet. Especially now, you can change your normal toilet into a bidet by installing a bidet toilet seat.

Essentially, a bidet is a bathroom fixture that uses a spray of water to help with cleaning after using the restroom. It functions the same way as toilet paper, except that it uses water instead of paper.

Toilets without bidets have no self-cleaning technology and instead rely on toilet paper or other materials for self-cleaning after use.

Another major difference between a normal toilet seat and a bidet seat is installation. In general, the setup of a bidet seat is relatively complicated:

  1. First, you will have to connect the bidet seat to a water supply valve to provide the water for spraying.
  2. Then, you’ll need to connect the bidet seat to an electric outlet to facilitate warm water spraying and air-drying.
  3. You’ll finally need to test all of these connections before using your bidet, otherwise it may not function properly. You also need to complete the same standard toilet seat installation steps in addition to the bidet seat-specific tasks.

As you can see, bidet seat installation requires several additional steps compared to the normal toilet seat which doesn’t need additional setup after installation. Furthermore, when it’s time to replace or repair a bidet seat, you’ll have to factor in the water and electricity supplies when removing the seat. Depending on how complicated your seat is, you may need a professional to help with any repairs.

Ultimately, it’s up to the user whether the hygiene and environmental benefits of a bidet are worth the added installation and repair requirements for a bidet seat compared to a normal toilet seat.

Closing Remarks

We hope this article helped show how easy it is to remove and replace your toilet seat on your own. Provided you have all the right tools and materials in place, installing a new toilet seat is a project that you can complete within a day or even an hour.

We hope that you find this guide useful the next time you plan to install a new toilet seat!

Bidet Seat Install Guide

modern bathroom top view

DIY toilet projects are a major trend nowadays, with many homeowners looking for opportunities to take on new projects at home. As peoples’ skills and needs increase, they’re even looking to pursue DIY plumbing projects, which used to be frowned upon. However, many projects are actually much easier to complete at home than you may think. For example, installing a bidet toilet seat is a quick, convenient DIY project to consider.

In this article, we’ll go through a full guide for how to install a bidet toilet seat in your home today. Let’s now get into the details of setting up one yourself.

Installing a Bidet Toilet Seat – Preparations

Before purchasing your new bidet seat, there are a couple of features of your current toilet and bathroom that you’ll want to consider. Basically, you’ll need access to both water and electricity sources to power the bidet seat.

Water Access Checks

Bidet seats need to connect to a water supply valve, which could either be behind or alongside the toilet. Usually, it shouldn’t be hard to access the water supply valve, but it’s good to identify where the valve is and be sure you won’t have issues connecting to it before you try to install the seat.

Electricity Checks

Particularly if your new bidet seat includes features like warm water and air drying, you will need to connect it to a power source to use these features. For electricity connection, ensure that your bathroom has a GFCI-rated outlet, with a ‘test’ and ‘reset’ button. Do not worry about accidental shocks, as these outlets feature a circuit breaker to prevent this from happening.

If your bathroom outlet isn’t close to the toilet, you can use an extension cord to connect your seat to the outlet. However, be sure that any extension cord you use in the bathroom is grounded and certified for outdoor use.

Once you’ve verified both of these components in your bathroom, you’re ready to start installing your new bidet toilet seat.

Installation Tools for Installing a Bidet Toilet Seat

Before you begin the installation process, it’s helpful to gather all of the tools you’ll need throughout the process. There are a few main items you’ll need to have on hand, beyond the new bidet seat itself.

Screwdriver

We recommend using a multi-bit screwdriver, which will work with different types of mounting bolts. If you don’t have a multi-bit option available, you may need a few different options depending on the type of screws used for your bidet seat

Adjustable Wrench

Similar to the multi-bit screwdriver, an adjustable wrench will help you tighten any metal connection that you encounter. There may be multiple parts to tighten with different sizes, so using an adjustable wrench ensures you’ll be able to tighten everything with no problem

Towel, Rag, and Bucket

Especially when you’re disconnecting the toilet’s water supply hose, some water may spill. We recommend placing a bucket to catch the water, with an extra towel or rag also on hand for final cleanup.

Step-by-Step Install Guide

It’s now time to complete the 5 key steps to install a bidet toilet seat on your own:

1. Turn Off Toilet Water Supply

This step may seem obvious, but it is pretty easy to forget. However, trust us when we say that you wouldn’t want to deal with any leaks during the installation by forgetting to switch off the water supply. Luckily, cutting off the supply is quite easy.

First, locate the shutoff valve, which should be just behind the toilet, close to the floor. Once you’ve located the valve, turn it clockwise until it won’t turn anymore. Finally, flush the toilet to drain any water that may be remaining in the tank.

2. Remove Existing Toilet Seat

When you close your toilet’s current lid and seat, you will spot two caps just behind the seat. These caps cover the mounting holes for the bolts that hold the seat on the toilet. Use your screwdriver to flip the caps open so you can access the bolts to remove the seat.

Once the caps are open, you’ll see the bolt heads underneath which you can unscrew with your screwdriver. Then, when you’ve removed the bolts, lift the toilet seat off completely.

hand unscrewing toilet seat

3. Install T-Valve – Toilet Current Supply Line

Your new bidet seat ought to have come with a T-valve, which gets its name from its ‘T’ shape. This gadget serves to divert water from the supply line to two places instead of one: the toilet and the bidet sprayer. To install the T-valve, start by unscrewing the supply hose from the bottom of the toilet’s tank. Be careful, because if there is any water in the tank, it may leak out, although most of the water should be drained from when you emptied the toilet before. This point is where the bucket and towel will be handy for dealing with any water.

After you’ve unscrewed the supply hose from the tank, you can then connect the T-valve in its place. Once you’ve connected the T-valve at the base of the tank, you can re-attach the supply hose on the bottom of the T-Valve. This step will allow your toilet to still have water while also providing a source of water for your bidet seat.

4. Mount New Bidet Seat

Next, slowly slide the bidet seat onto the mounting bracket on the toilet until it clicks into place. Then, conduct a quick wiggle test to ensure the seat doesn’t shift around. If the seat doesn’t feel like it’s firmly in place, you may need to remove it and tighten the mounting bracket further. Keep testing the seat until it feels firm and doesn’t shift around when you pressure test it.

5. Connecting Bidet Seat to Water Supply

After you’ve firmly secured your bidet seat to the toilet, the final step is connecting the water supply to the seat. This step is where you’ll use the second part of the T-valve you installed earlier. Basically, you’ll attach the available end of the T-valve directly to the bidet seat, which will connect your seat to the water supply hose.

Lastly, tighten up all the connections to make sure nothing feels loose. Then, you can restart the water supply by turning the knob counterclockwise. At this point, as long as there are no leaks, you should be good to go, ready to enjoy what your new bidet has to offer!

Final Thoughts

As you can see, installing a bidet toilet seat is not as complicated as it may seem. With all the tools in place, you should be able to have your new seat installed within minutes. Especially if you invest in a high-quality unit, just a few minutes of work will lead to many years of use from your new bidet toilet seat.

Basement Toilet Install Guide (Read This)

basement toilet install

Installing a toilet in your basement is an excellent way to maximize your living space. It can transform your ground floor from a drab storage area into another full story of entertainment. 

Placing a restroom on the ground floor isn’t necessarily difficult, especially if you already have a sewage system and main water supply (as most homes do). However, when the main line is above the basement level, homeowners can run into issues when placing a toilet on the ground floor. 

In 1665, Isaac Newton discovered gravity. If you attempt to install a toilet below the main water line of your home, Newton’s discovery may cause you quite a bit of hassle. When you flush a toilet on any other level of your home, gravity helps move the waste into sewage. However, when this line is above your new basement restroom, gravity will work against you. 

Never fear; there are ample solutions to install a fully functioning toilet below the main water line of your home. Let’s get creative and expand your home living space to the ground floor. 

Pro Tip: Only attempt this project if you have some DIY experience and the proper tools. If not, a plumber is just a phone call away. 

Issues with a Basement Toilet Install

Pipe Issues

Sometimes, the main water line of your home may not be located in your basement. This can make it excessively difficult to install a toilet and may cause you to want to give up on the process entirely. Don’t do that – there are plenty of unique solutions like upflush toilets and composting options that our bathroom experts know all about. 

Concrete Issues

We know, breaking concrete basement floors can be quite an ordeal. It often requires more than one person and a skill level well beyond the basics. To install a basement toilet, breaking concrete is often necessary to access drain lines. This goes above and beyond your average DIY project and definitely should not be done by beginner home improvers. 

The Basics (Installation)

Install Step 1: Locating Rough-in and Plumbing

The first step to installing a toilet is locating the rough-in and plumbing connections. In most cases, the rough-in will be between 10 and 14 inches from the wall, which makes it easy to find. If you are not versed in toilet talk, a rough-in is where plumbing lines enter a house, but final connections have not yet been made. This is where you will connect your new toilet lines to. 

You must also find the water supply pipes. They tend to be located around nine inches above the floor, usually behind the drain. In some cases, a flange will already be installed, but it could be installed too high or too low. Especially in older homes, locating these important lines may be tricky. 

If you’re getting frustrated trying to find the rough-in lines, this video can help provide some clear direction. 

Pro Tip:  If the lines are installed too high, you can simply cut them down and add a new flange. If it’s installed too low, you will need a flange extender, which you can find at a relatively low price in most hardware stores. Fixing issues does not have to cause stress!

Install Step 2: Preparation

The golden rule of plumbing work: always turn off your home’s water supply before getting started. Unless you want to get doused in water and potentially flood a room or two in your home, that is. 

Pro Tip: Some homes require the utility company itself to cut off their water line. Check with your provider to see if you can do it yourself or not. 

Install  Step 3: The Toilet Flange

A flange is a pipe that mounts a toilet to the ground and connects it to the drain pipe. When installing the flange, the first thing you must do is inspect the drain pipe. A drain pipe comes in many shapes and forms. It may be metal, ABS, or another material entirely. Whatever you do, make sure the flange is made from the same material to avoid a toilet disaster. 

If your drain pipe is not at floor level, you need to cut it down. Once you do this, remove the cap with a hammer. 

Pro Tip: Toilet drains don’t smell like a bouquet of roses. Stuff it with a cloth to avoid a foul smell wafting around during installation. 

All toilet flanges have four holes. You will need to ensure that two of the four holes are at the same distance from the wall so that the toilet can sit straight. With a hand drill, prepare the holes in the flange, and then use the hammer drill to make holes in the floor. Clean the drainpipe and the flange with fine sandpaper and add adhesive to both ends. 

Pro Tip: Make sure to buy the proper adhesive based on your flange and drainpipe material.

Next, insert the flange, ensuring it has enough adhesive applied. Fix the flange to the ground using concrete screws, and your flange is installed!

Install Step 4: The Shutoff Valve

Installing the shutoff valve is pretty simple – similar to the flange, you’ll start by turning off your water supply. Once you do this, cut the end of the pipe and de-burr the rough end with sandpaper. Slide the compression nut onto the pipe. Make sure that it goes as far as possible. 

Once the compression ring is in the correct position, ensure that it fits properly, and then attach the compression valve over the ring. Finally, tighten the compression nut and inspect it to ensure that nothing leaks. If everything is fine, that’s it – you have successfully installed the shutoff valve.

Install Step 5: The Toilet

Pro Tip: It’s a good idea to have someone help out with this step. Toilets are a two-person job!

To start installing your new basement toilet, install the closet bolts. If you have any plastic clips to hold the bolts in place, add them as well. After this, install the flange seal. Be careful here – you can use wax for the seal, but if there is no one around to help you out, it’s better to use a seal with no wax. Put the tank in the proper position, and make sure that you lift it over the closet bolts. 

Pro Tip: Install the bowl first and then the tank.

Screw the nuts onto the toilet bolts carefully. If you tighten them too much, you might break the bowl. Then, connect the water supply somewhere between the shutoff valve and the fill valve and turn on the water. Inspect for any possible leaks. If everything is fine, your toilet is ready for use!

Install Step 6: Covering Exposed Pipes

So you just installed your stunning new toilet, but unsightly exposed pipes are now lining your restroom. Never fear, there are three methods to solve this problem.

Method 1: Cover the pipes with fabric or decorative tape. This is the easiest and least involved method. It is perfect for those who don’t mind the retro look of exposed pipes and want an art project instead of something more tedious. 

Method 2: Paint the pipes to match the bathroom color, or paint them with an accent color to add a unique look to your bathroom. We believe that this is the best method to use. It gives pipes a clean look without having to break out the construction tools. 

Method 3: Hide the pipes by building a box to cover them.

Note: Depending on your municipality, you might also need to install a fan in your bathroom. A fan is a great way to control moisture and avoid bad smells in your bathroom, so we recommend doing this anyway. 

Basement Toilet Solutions

In some cases, the drain line will be above your ground floor. This can make installing a basement toilet difficult. In even more cases, you may not have the skillset, manpower, or time to break concrete and access drain lines in your basement. Don’t stress. There are ample solutions to get that basement toilet anyway. 

Solution 1: An Upflush Toilet

We believe that an Upflush toilet is the best solution for anyone looking to install a toilet anywhere in their house, hassle-free. Upflush toilets have the same features and usage of regular toilets. The only difference is where the waste goes when you flush. 

While typical toilets use gravity to send waste off into sewage, an upflush toilet has a special pump behind it with the purpose of waste disposal. It takes up so little space that bathroom visitors may not even notice the difference between this and a commonly installed toilet. 

When an upflush toilet is flushed, the waste is ground down using a macerator and then fully disposed of, making it empty for the following toilet user. 

Installing an Upflush Toilet

Installing an Upflush toilet is a much easier process than standard toilet installation. Simply drill the macerator into the floor, plug it into an outlet, connect drainage to rough-in lines using PVC piping, and attach the drainage from the toilet to the macerator using a hose clamp. Attach free air vents, slip the discharge tube into the macerator pump, and position the upflush toilet. 

Pro Tip: Zip ties can help keep the drain connecting the toilet to the pump in place. 

Solution 2: A Composting Toilet

Composting toilets are completely dry, meaning you do not need to connect them to plumbing at all. They simply compost human waste in a low cost, low maintenance manner. Assembly takes seconds. All you need to do is slide the pieces of the toilet together and add a carbon additive to digest the waste. 

Composting toilets do not create sewage (or a biohazard) as they separate liquids from solids. Believe it or not, these toilets do not smell (this is a common misconception). Waste goes into a secure chamber with a closeable lid. You also only need to empty them every few months, the composting process does most of the hard work for you. 

Frequently Asked Questions

Do I Need a Special Toilet for My Basement?

Not exactly. However, as you can see, the installation process can be quite different than when installing a toilet in another place in the house. This is helpful to keep in mind when picking out your toilet. If you do not want to (or cannot) go through the normal toilet installation process, invest in an upflush or composting toilet. 

What Is the Total Cost of Adding a Toilet to the Basement?

The average price for installing the toilet in your basement is around $1,500. However, the price can greatly differ depending on the model you want to install and if you wish to do it by yourself or call the plumber. In some cases, the cost could go over $2,000.

Is there a way to Install the Toilet in a Basement without Breaking Concrete?

If you don’t want to break the concrete, you can install an upflush toilet or composting toilet. Both of these options require minimal installation and are great options for a low hassle job. 

Bottom Line

Adding a toilet to your basement isn’t difficult. Make sure that you have all the right tools and an extra set of hands. As long as you carefully follow the installation guidelines for your toilet, you should have your new toilet installed in no time!

Toilet Floor Tile Guide (Methods)

how to tile around a toilet

New tiles in your bathroom are a beautiful addition that will last for years. Plus, there are several durable and practical materials ideal for a bathroom. Installing new tiles uses only a few simple tools that can be found in most households.

Types of Tiles to Choose

Although most people use porcelain tiles for their bathrooms, there are several options that you can choose from.

Porcelain Tiles

This choice is ideal if you want your bathroom tiles to last for decades. Plus, porcelain can be made to look like wood, stone, or any other material, while retaining its sturdiness and water resistance. These tiles might be slightly pricey, but they are an excellent long-term investment.

Ceramic Tiles

These tiles are made from the same material as porcelain tiles. However, ceramic tiles are less finely ground, and they can be used for walls, too. They also cost less, allowing you to achieve a luxurious look for less money.

Marble Tiles

Marble tiles are an excellent choice if you want to make a luxurious bathroom. You can also find them in many different colors to perfectly fit your style, but note that they are a costly option.

Mosaic Tiles

These tiles are made from various materials, including porcelain and glass, hence their eclectic look. They are not expensive and will turn your bathroom into something completely unique.

Limestone Tiles

Limestone tiles are excellent if you want a more natural look for your bathroom. They are durable and also provide a sense of comfort due to their brown and beige color combination.

Slate Tiles

If you have a large family and the bathroom is often used, slate tiles are an excellent choice. They are highly durable and almost impossible to crack or scratch. Also, these tiles come in many different colors but note that they can be a bit expensive.

Vinyl Tiles

Vinyl is a good option since it’s highly durable, easy to maintain, and cost-effective. You can find them in different color variants, or even vinyl that looks like wood or stone. These tiles are slightly pricey, but the price is definitely justified with quality.

Pebble Tiles

These tiles are very popular among people who want to add a sense of nature to their bathroom. They might require a bit of maintenance, but if you maintain them properly, pebble tiles can last for decades.

Terracotta Tiles

Terracotta tiles are ideal if you want to achieve a Mediterranean look in your bathroom since they are usually orange or yellow. Although they might be slightly tricky to install, terracotta tiles will create a sense of warmth and comfort in your bathroom.

Glass Tiles

If you want a material that is easy to customize, you should opt for glass tiles. They come in numerous shades and colors and are highly practical. Plus, glass tiles are both water and stain-resistant.

Tile Floor Around a Toilet Guide (4 Methods)

There are four basic methods on how to tile your bathroom, including the floor around the toilet. We will go step-by-step through each method so that you can understand which is easiest for you.

Method 1: Cut Around an Installed Toilet

First, install the full tiles that surround the toilet. Most likely, there will be four tiles that are not yet installed that you have to modify. Keep in mind, if the toilet is already installed, make sure to leave a space of around 5 cm between the toilet base and the edge of any tile around.

Next, cut four sheets of paper to match the size of the tile. Then, put all the sheets around the toilet base and fold them so that they match the exact shape of what the tile should be cut like. Mark the cut locations with a marker and remove the sheets. Also, note that it’s better to overestimate the cut location than to make it smaller than it should be since it will leave space between the tile and the toilet.

Now that you have an accurate template for each tile, cut these sheets of paper and put them around the toilet base again. If everything fits properly, put the sheets on the tiles and trace the cut locations. Then, using the tile nippers, carefully remove the extra material from each tile. An important thing that you should remember is to wear safety glasses and gloves. While cutting, shards might get into your eyes, or you might cut your hands on sharp edges.

Method 2: Tracing Cut Lines

In this case, you should tile the whole bathroom, but leave space for one tile where the toilet flange should be. However, if your tiles are small, you might need more than one. Like the previous method, you’ll need sheets of paper that match the tiles that haven’t been installed yet. Put those sheets over the flange and trace the flange onto the tile(s). You don’t need a perfect trace since the toilet will sit over the flange. Additionally, make sure not to throw away the paper, since you might need it again if you don’t cut the tile properly.

Method 3: Cutting Multiple Tiles

For this method, you will need a tile scribe, which you can find in most hardware stores. Plus, you will need tile nippers to cut away extra tile. We advise you to start from the corner and take small “bites” as you go along the line. Of course, make sure that your eyes and gloves are protected.

Before you glue the tiles to the floor, make sure to dry-fit them to see if everything fits properly. Keep in mind, if you would like to use a removable flange, make sure to remove it before dry-fitting and when gluing the tile to the floor.

Method 4: Cutting a Single Tile

The easiest way to do this is by using an angle grinder and a diamond wheel blade. Position the grinder 45-degrees to the tile and slowly cut the circle that you marked before. Make sure not to wear any jewelry or long sleeves, and of course, wear a dust mask. The grinder will produce lots of dust which can be unhealthy if you are exposed to it for too long.

If the circle is too close to the edge, it’s a good idea to cut “sacrificial break notches.” Basically, cut two lines that run between the edge of the tile and the closest point on the circle. It will prevent the tile from breaking while you are cutting the circle. Of course, dry-fit the tile that you’ve just cut to make sure that it fits properly.

Frequently Asked Questions

How Long After Tiling Do I Install the Toilet?

Usually, you should wait between two and three days before installing the new toilet or putting the old one back.

How Long Do I Wait for Grouting After Laying the Tiles?

The common rule is that you should wait at least one full day. Although the edges might look dry pretty soon, the material under the tile doesn’t receive as much air and takes longer to dry.

Our Take

Tiling the floor around the toilet can be challenging for those with no DIY experience. However, if you have some basic DIY experience and at least some experience with tiling, it won’t be a problem. No matter what type of bathroom and toilet you have, we are sure that one of these four methods will help you to tile floor around toilet.

Install a Toilet Flange Guide

basement plumbing

A flange is the part of the toilet which connects the toilet to the drainpipe in the floor. You may need to change the flange if it is cracked or broken and water is leaking from around the base of the toilet. While the task of replacing the flange itself is fairly straightforward, it does require a high amount of strength and precision.

If you are not as experienced with DIY plumbing work, we recommend calling in a professional to either complete the repair or offer advice while you complete the task. However, if you have the skills, experience, and time to do the repair yourself, we’ve outlined all the steps below for how to efficiently replace a broken flange.

Tools You Will Need

Installing a new toilet flange doesn’t require special tools. You will need the tools listed below.

  • Old newspapers (to cover the floor)
  • Screwdriver
  • Putty knife
  • Rag
  • New flange

How To Install a Toilet Flange

There are 4 main steps to follow when installing a new toilet flange.

Step 1- Preparing the Area

Now, first of all, replacing the flange is going to be messy. We recommend covering the bathroom floor with newspapers which can be cleaned up easily afterward. This step is pretty much the rule for any toilet repair-related activity. Next, disconnect the water supply to the toilet and flush the remaining water in the bowl. If any water still remains, you can use a sponge to get rid of it. Finally, unscrew the toilet from the ground and remove it, placing it on the newspapers to protect your floors.

Step 2- Out with the Old

To remove the old flange, first, you will have to scrape off the wax on the flange seal. Use a sharp object such as a putty knife to peel off all the wax from the seal. Then, unscrew the flange from the floor using a screwdriver. As a precaution against sewer gases, which may back up into your bathroom from the floor opening, we recommend stuffing a rag cloth over the opening of the drain while you work.

Step 3- Getting a Replacement

Clean up the flange with disinfectant so you can bring it to a hardware store to get a replacement. You’ll also want to measure the diameter of the drain pipe to be sure what size to look for. Flanges can be easily found in any plumbing supply or home improvement store, and it shouldn’t be hard to find a replacement for the old flange. While buying the flange, do not forget to purchase a new wax seal to go with it.

Step 4 – The Installation

Once you’re back home with the new flange, it’s time to complete the installation. Start by removing the rag from the drain so that you can install the new flange. Place the flange on the floor over the drain and tighten the bolts around it. These bolts should stick out of the floor and attach to the toilet. Secure the flange by using a screwdriver and the screws that should come with the product. Finally, place the wax seal on the bottom of the toilet in its designated space.

Now, carefully position your toilet over the drain so that the bolts are right below their respective holes. Push the toilet into place and tighten the nuts around the bolts to secure the toilet to the floor. In case there is any space between the toilet and the floor, you can insert some pennies to easily even everything out.

Make sure that the toilet is stable. Reconnect the water supply and flush the toilet once to make sure everything is working properly. If you notice the toilet is still leaking, then you need to consult an expert as to whether it is some other problem or improper installation.

3 Common Mistakes When Installing a Toilet Flange

Installing a toilet flange can often be messy, and in all that mess, it’s easy to make a mistake. Below are the most common mistakes people make when installing a toilet flange.

  • Letting the flange sit too tall. In theory, you can install the toilet with a high sitting flange. However, a too-tall flange comes with the risk of breaking in the long run. By installing the flange at a safe height, you will avoid the risk of your flange breaking and will prevent the additional costs of calling the plumber in the future.
  • Forgetting to cut off the water supply. People often forget to cut off the water supply to the toilet when installing a new flange, which can lead to a big mess. Ultimately, shutting off the water supply is one of the most essential steps when installing a new flange or a new toilet. Furthermore, when you cut off the water supply, make sure to flush the toilet to drain any remaining water. Without these steps, you’ll have a lot of water in your bathroom to deal with in addition to the actual flange installation.
  • Over-tightening nuts and bolts. Although you want to make sure that all the nuts and bolts are tightened enough, over-tightening them can lead to breaking and cracking, which leads to additional costs. Therefore, go slow while tightening everything to safely secure the parts without any unintended damage.

Conclusion

As you can see, installing a new flange is not difficult. However, since it’s going to be messy, it’s essential to cover the floor before installation. Also, make sure to gather all the necessary tools before the installation so you don’t have to stop midway through to grab anything. Finally, always remember to shut off the water supply before beginning the process, and you’ll have a new flange installed quickly and easily!