If your toilet constantly has either too much water or too little to flush, chances are that there’s an issue with the toilet float.
A loose float will allow in too much water which can lead to leakages; though this may not seem severe, studies show a leaky toilet can easily waste up to 200 gallons of water per day.
Learning how to adjust a toilet float is extremely important in order to prevent further water wastage and potential clogs down the road.
Take a look at our instructional guide to toilet floats to better understand how to tackle these issues.
Page Contents
Determine a Toilet Float Problem

Prior to attempting to fix your toilet float, it is important to determine if it really is the problem in the first place.
Look out for continuously running water and a higher-than-usual water level. Conversely, another sign that your toilet float is having issues is when there’s too little water in the bowl.
Once you have diagnosed the problem, it’s time to proceed.
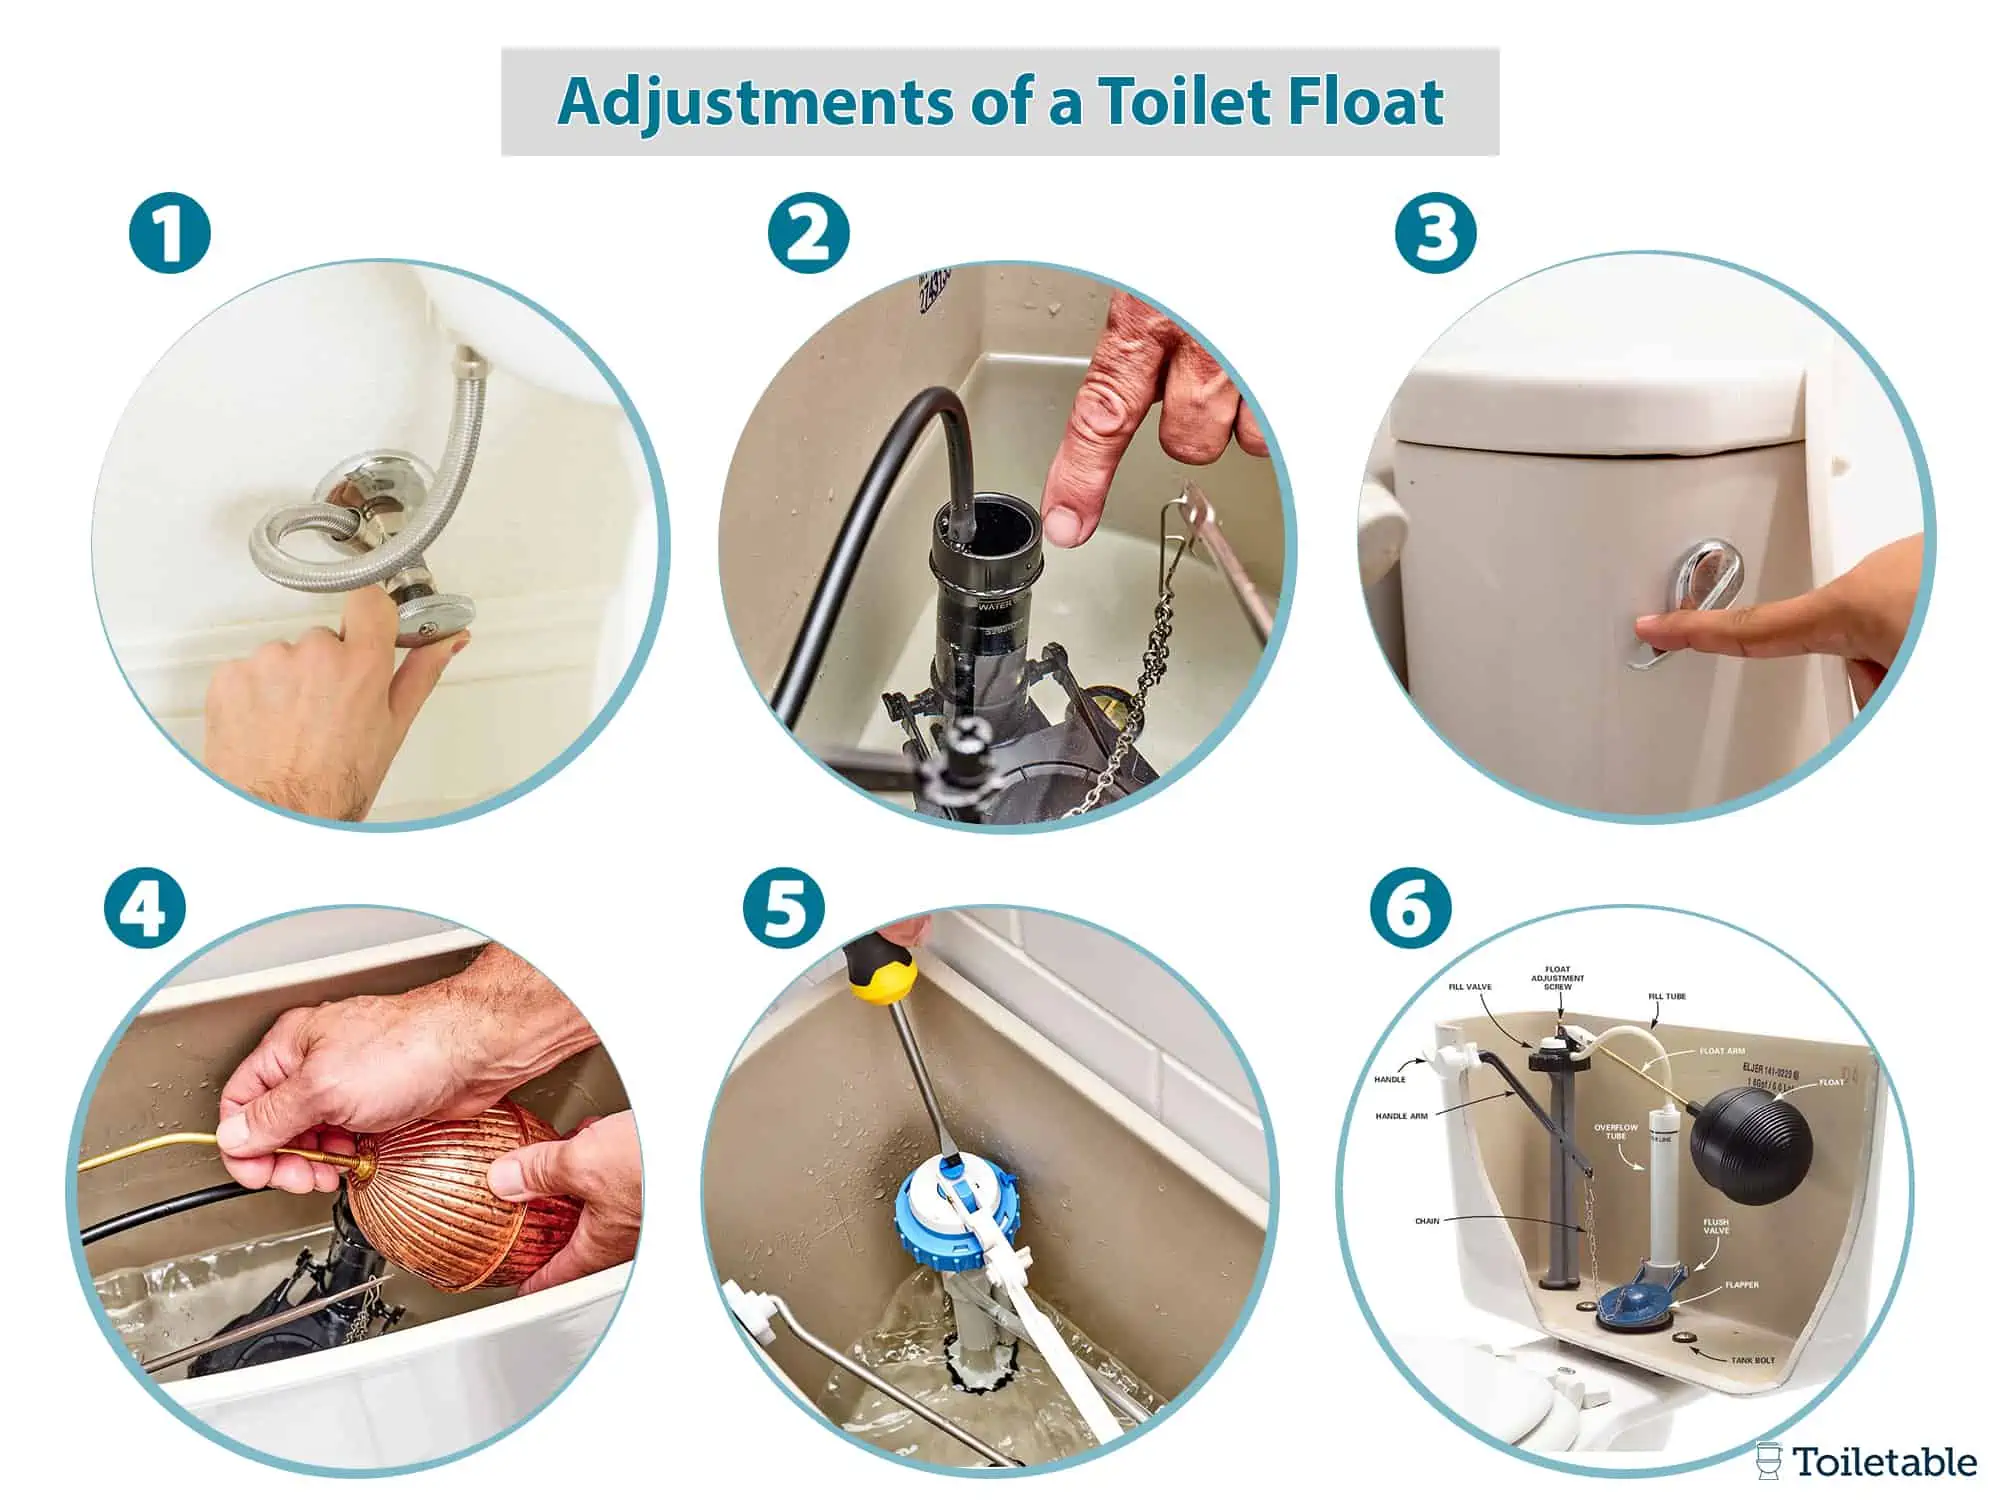
Adjustments of a Toilet Float – The Procedure for Ball-And-Arm Floats

Step 1 – Stop the Water Supply
Shut the further water supply to the toilet before you begin the adjustment. This will help you prevent further spillages and accidents.
Step 2 – Check the Current Water Level
With the water supply stopped, begin by checking the water level in the toilet. The ideal water level sit’s approximately one to two inches below the overflow tube.
Step 3 – Flush the Toilet
Now that you have an idea where your toilet’s water level currently sit’s, you’ll need to go ahead and flush to empty it.
Step 4 – Check the Toilet Float
Inspect each and every part of the float mechanism, including the plastic ball. Look out for any signs of damage, such as the float having water inside of it or the plastic ball being broken.
In such cases, your best bet is to have the entire toilet float replaced rather than adjusted.
Step 5 – Adjust the Level with a Screwdriver
How you adjust your toilet’s float will depend on whether you want the water level to rise or be lowered.
If the water level is too low, this means that the float’s screw is too tight and needs to be loosened up.
If the water level is too high, then the float screw will need to be re-tightened.
You can tighten or loosen it by turning either clockwise or counter clockwise. Just be careful not to overdo it. Too much rotation to either side might create new problems.
Generally, how much you tighten or loosen the system should be based on how bad the problem was. A slight overflow, for instance, can be resolved with half a turn. A major overflow can typically be resolved with a full rotation or two.
Step 6 – Check if Everything Sit’s Right
Once you’re done adjusting the level using a screwdriver, it’s time to confirm if the water level sit’s right. You’ll need to re-open your toilet’s water supply and allow for 60 to 120 seconds for it to fill up.
Once the in-flow stops, carry out a physical examination to see if the level is one to two inches below the overflow tube.
If the level is still too below this mark, you’ll want to loosen the system by turning it for another half-turn or so until you achieve the ideal level.
However, if the level is too high, you’ll need to flush the toilet and repeat the process all over again beginning with an empty toilet.
Adjustments of a Cylinder Toilet Float

The first two steps of adjusting a toilet float in a cylinder toilet are similar to those of the ball-and-arm float.
Step 1 – Stop the Water Supply
Shut the further water supply to the toilet before you begin the adjustment. This will help you prevent further spillages and accidents.
Step 2 – Check the Current Water Level
With the water supply stopped, begin by checking the water level in the toilet. The ideal water level sit’s approximately one to two inches below the overflow tube.
Step 3 – Lookout for the Adjustment Stem
Look out for a tiny tube either dangling horizontally from the top or running parallel to your toilet’s fill valve.
On it, you’ll need to identify a special clip.
Step 4 – Adjusting the Clip
Squeeze (or release) the clip and move it either way depending on how you want to adjust the height. You can raise it to increase the water level or lower it to prevent an overflow.
While keeping your float by half-inch, use your fingers to firmly keep the dial against the edge of the stem.
While at it, keep a full rotation by either rotating the stem clockwise or counter clockwise.
Step 5 – Confirm the Results
Turn the water back on and leave it to flow for at least two minutes. Check the water level and confirm that it sit’s within the ideal level.
If not, flush the toilet and repeat the process.
Final Thoughts
It is important to learn how to adjust toilet floats so you can do this on your own at home. By doing so, you can save yourself time and money – while also preventing further leakages and keeping your toilet in a top-notch condition.
